Pasta & Patchwork
  • Home
  • About P&P
  • Patterns
  • Recipes
  • Projects
  • Product Reviews

Expat Life: On the Darkest Days

2/20/2015

19 Comments

 
On the darkest days an innocent misunderstanding cannot be laughed off, because it reminds you that you are the foreigner and you did not understand and they will always know things you don’t.

On the darkest days all decisions seem futile, from choosing a frame to go on the wall to picking a school for your child. Because what’s the point in making a permanent mark when you might be moving on in a matter of months?

On the darkest days no amount of chitchat with the friendly lady at the bakery or with the other mum from nursery makes up for not having someone you can just sit with in companionable silence, safe in the knowledge they’ve known you for so long you don’t need to speak.

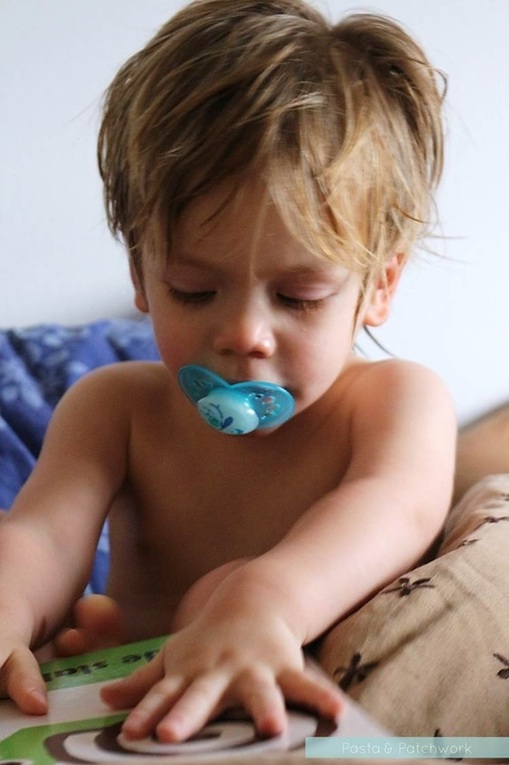
On the darkest days your child asks to visit his grandparents, and you don’t know whether your heart can take having to say “no my love, we can’t” for the 20th time that week. 

On the darkest days you just want to eat the same foods, have the same habits, and drum to the same beat as everyone around you, despite having felt proud of your stinky tea with milk and your improbably early dinners the day before.

On the darkest days you feel unreasonably, disproportionately jealous of anyone who’s mum pops in to do the laundry or cook dinner on an ordinary weekday, despite knowing you’d never ask her to do these things even she you lived round the corner.

On the darkest days you ache for “home”, until you remember you've moved so many times the very concept has faded to something undefinable, and you ache even more.

On the darkest days you look at your partner and will them to be simultaneously strong and fragile: don’t crack because I won’t be able to cope if you do, but don’t be too tough because I need to know I’m not the only one hurting.

On the darkest days it’s not enough to remind yourself that this is a lifestyle choice that YOU made. Because you wonder whether you should have made it at all.

On the darkest days all you can do is take yourself to bed with chocolate and crochet, and hope that tomorrow you’ll wake up feeling ready for more adventure.

March Update: 
Okay, well I feel better for having gotten all that off my chest! And also for having received so many wonderful supportive responses - the blogging community never fails amaze me, so THANK YOU. 
Finally, I'm also pleased to say that while we're still dealing with the uncertainty that comes with temporary work contracts, we did get a place for the Bean at the school we wanted. This is good! If we do stay, at least we know he will be in a great place. And the rest will hopefully come together eventually :-)

Come say hello:
Pasta & Patchwork - Home

Picture
19 Comments

"Ribbed Cross" Granny Square - Free Pattern & Tutorial

2/19/2015

20 Comments

 
And on it goes, granny square after granny square… Actually progress has been rather slow as I’ve gotten distracted with other projects (nobody has just one WIP, right?!), but the green squares are now all done and joined. The blue and light pink ones are also getting there, so I’ve just the fuchsia and yellow ones to do.
I’m still dithering over how to bring everything together, seeing as I didn’t plan this “crochet meets patchwork” blanket very well… Okay I didn’t plan it at all, but that’s part of the fun!

In any case, today I’m sharing a second square from the green section. It's the first square I came up with for this blanket, and it's still one of my favourites. 
The cross is achieved using a combination of Front Post and Back Post Treble Crochet stitches (Double Crochet if you're in the US). These stitches are a bit fiddly but they're absolutely worth trying - they have such a great texture! I've included an explanation of how to do them below, but you might also like to watch a video on the front post TC/DC and a video on the back post TC/DC first.
Joined green squares for the

"Ribbed Cross" Granny Square

Notes:

UK terms (with US terms in brackets)

2.5 mm (C) hook

Natura 100% cotton - fingering yarn

Colours: Aswan (A), Ivory (B), Topaze (C)

square size: 10 cm x 10 cm (ca. 4" by 4")

stitches: Front Post treble crochet - FPTC (Front Post double crochet - FPDC) Instructions below; Back Post treble crochet - BPTC (Back Post double crochet - FPDC) 
Instructions below; treble crochet - TC (double crochet - DC); double crochet - DC (single crochet - SC); chain - ch (chain stitch - ch); slip stitch - sl.st. (sl.st.)
Green and Pink
Round 1:
With colour A make a starting chain of 7, then make into a circle with a sl.st into the first ch.

Round 2:
Ch 6, then TC 
(DC) 3 around the circle you made in Round 1, ch 3, TC (DC) 3 around the circle you made in Round 1, ch 3, TC (DC) 3 around the circle you made in Round 1, ch 3, TC (DC) 2 around the circle you made in Round 1. Join to the 3rd ch with a sl.st. (i.e. a traditional granny square round).

Round 3:
Ch 2, then HTC (HDC) 2, ch. 3, HTC (HDC) 3 around the ch 3 that makes up the corner.
Now work a Front Post TC (Front Post DC) as follows: YO, insert hook from right to left behind the “post” of the TC (DC) of the previous row [see picture below]; the “post” is in front of your hook now. YO and pull up a loop, YO and pull through the first two loops on the hook, YO and pull through the two loops on the hook to finish the stitch.
For the next TC (DC) of the previous round, we want to do a BACK Post TC (Back Post DC): YO and insert hook from right to left in front of the “post” of the TC (DC) of the previous row
 [see picture below]; the “post” is now behind the hook. YO and pull up a loop, YO and pull through the first two loops on the hook, YO and pull through the two loops on the hook to finish the stitch.
For the next TC (DC) of the previous round, work another FPTC (FPDC).
*HTC (HDC) 3, ch 3, HTC (HDC) 3. When you get to the next set of 3 TCs (DCs) of the previous row, FPTC (FPDC) - BPTC (BPDC) - FPTC (FPDC); repeat from * until you’ve gone all the way round. Join to the 2nd ch. with a sl.st. Fasten off.

step one for Front Post Treble Crochet
Front Post TC (Front Post DC) - YO and insert hook behind the "post"of next st.
Step one for Back Post Treble Crochet
Back Post TC (Back Post DC) - YO and insert hook in front of the "post" of next st.
Round 3 of the Ribbed Cross Granny Square
Round 4:
Attach colour B onto a corner and ch 2. HTC (HDC) 2, ch 3, HTC (HDC) 3 to go round the corner. *HTC (HDC) 1 into each of the next 2 st. When you get to a set of Front and Back Post st., work the same into them again: FPTC (FPDC) - BPTC (BPDC) - FPTC (FPDC). HTC (HDC) 1 into each of the next 2 st. HTC (HDC) 3, ch 3, HTC (HDC) 3 on the corner.; repeat from * until you’ve done the 4th set of Front/Back Post stitches, then HTC (HDC) 1 into each of the next 2 st. Join to the 2nd ch with a sl.st.
Round 4 of the
Round 4 of the
Round 5:
Sl.st. 1 around the first HTC (HDC) of the previous row, then ch. 2. HTC (HDC) into the next st.
*HTC (HDC) 2, ch 3, HTC (HDC) 2 on the corner. HTC (HDC) 1 into each of the next 4 st. When you get to a set of Front and Back Post st., work the same into them again: FPTC (FPDC) - BPTC (BPDC) - FPTC (FPDC). HTC (HDC) 1 into each of the next 4 st.; repeat from * until you’ve gone all the way round. Join to the 2nd ch with a sl.st.
Round 5 of the
Round 6:
Sl.st. 1 around the first HTC (HDC) of the previous row, then ch. 2. HTC (HDC) into each of the next 2 st. *HTC (HDC) 2, ch 3, HTC (HDC) 2 on the corner. HTC (HDC) 1 into each of the next 5 st. When you get to a set of Front and Back Post st., work the same into them again: FPTC (FPDC) - BPTC (BPDC) - FPTC (FPDC). HTC (HDC) 1 into each of the next 5 st.; repeat from * until you’ve gone all the way round. Join to the 2nd ch with a sl.st.

Round 7:
Sl.st. 1 around the first HTC (HDC) of the previous row, then ch. 2. HTC (HDC) into each of the next 2 st. *HTC (HDC) 2, ch 3, HTC (HDC) 2 on the corner. HTC (HDC) 1 into each of the next 6 st. When you get to a set of Front and Back Post st., work the same into them again: FPTC (FPDC) - BPTC (BPDC) - FPTC (FPDC). HTC (HDC) 1 into each of the next 6 st.; repeat from * until you’ve gone all the way round. Join to the 2nd ch with a sl.st. Fasten off.

Round 8:
Attach colour C onto a corner and ch 2. HTC (HDC) 1, ch 3, HTC (HDC) 2 to go round the corner. *HTC (HDC) 1 into each of the next 7 st. When you get to a set of Front and Back Post st., work the same into them again: FPTC (FPDC) - BPTC (BPDC) - FPTC (FPDC). HTC (HDC) 1 into each of the next 7 st. HTC (HDC) 2, ch 3, HTC (HDC) 2on the corner.; repeat from * until you’ve done the 4th set of Front/Back Post stitches, then HTC (HDC) 1 into each of the next 2 st. Join to the 2nd ch with a sl.st.
Round 8 of the
Round 9:
Sl.st. 1 around the first HTC (HDC) of the previous row, then ch. 2. *HTC (HDC) 2, ch 3, HTC (HDC) 2 on the corner. HTC (HDC) 1 into each of the next 8 st. When you get to a set of Front and Back Post st., work the same into them again: FPTC (FPDC) - BPTC (BPDC) - FPTC (FPDC). HTC (HDC) 1 into each of the next 6 st.; repeat from * until you’ve gone all the way round. Join to the 2nd ch with a sl.st. Fasten off.
Pink
Done! As well as a blanket square, this pattern works very well as a coaster. You could also do a whole bunch to make a cushion cover, as it's nice and stiff thanks to the cotton. 
Pink
When you’ve finished your square it’s a good idea to block it, as it’ll look much neater and, well, square! 

Written pattern copyright Eline Alcocer 2015. 
You are welcome to make and use this pattern as you wish, but please do not sell the pattern nor claim the pattern as your own. 
You are welcome to sell items made using this pattern as long as the designer, Eline Alcocer, is clearly credited at the Point of Sale. 
Please link back to this page if you write about the pattern in any way. 
You may not reproduce, either partially or in full, any of the photos or the text contained in this post without obtaining written permission from me first. 
Thank you and happy crocheting!

Like this pattern? Try the "Triple Puff" Granny Square too!
Triple Puff Granny Square

Come say hello: 
Pasta & Patchwork - Home
I'm linking up with Moogly and Petals to Picots for Hookin on Hump Day #89
20 Comments

This is Milano | La Ciribiciaccola

2/16/2015

5 Comments

 
When you pack up both your belongings and your former sense of self, in the hope of finding more than just a cold work or study "opportunity", the first thing you do upon arrival is look for the little things that bring comfort. Things that take away the feeling of swimming underwater as an unfamiliar language swirls around you. Things that can be shared with enthusiasm with visitors from home. Things that make you feel like you belong, like it was all worth it, this upping of sticks and the chaos and the strangeness.

So in a new place I look for the things that bring comfort to me: a farmers' market, a good bakery, a cosy cafe, a beautiful yarn store (priorities...). Sometimes, though, the things that bring comfort find you. In spite of yourself, you learn to embrace them and before long, you realise certain things will never, should never be the same. 

After years in Japan, I can't really imagine a hot summer's day without cold soba noodles, despite finding them slimy at first. After two decades in the UK, the only tea I will drink is Yorkshire, despite gagging at my first cup, aged 18. And now, after four years in Italy, I feel winter would not be winter without hot chocolate so thick you have to eat it with a spoon, despite asking for milk to thin it with at the first encounter (and being threatened with immediate repatriation to Britain by the husband if I dared to put the request to the waiter). 

When it comes to comfort in Milan, then, it's not a good cuppa I seek (because, in all honestly, most places here will give you Liptons...). It's a hit of this:
Picture
And the toddler gets a hit of this (in winter, because it's never too cold for ice cream even when you're only 30 miles from the Alps):
Picture
And we feast our eyes on all the colours, the lights, the prettines, the sheer kitsch and cheer of it all on the drizzliest of days.
Picture
Picture
Picture
The place is La Ciribiciaccola, a family-run patisserie/chocolate confectioner/gelateria to the East of the city centre. A little slice of heaven where they produce their own ice cream, chocolate pralines (including some savoury ones with cheese inside, for example), biscuits and cakes, stuff to make your own pretty ice creams with. The most amazing crepes. Oh and did I mention chocolate?
Picture
Picture
They do actually also have an impressive selection of teas and infusions, as well as some bits and bobs from outside of Italy. 
Picture
If you ever find yourself in Milan and in need of comfort, come here. 

I'm taking part in Style in Your City, a new fortnightly link-up series launched by two inspirational ladies, Fritha from Tigerlilly Quinn and Lori from Wild & Grizzly. As I wrote a few weeks ago, it's taken me some time to find the beauty in living in Milan, but I'm learning to see its charms. 
This is also the year in which Milan will host EXPO 2015. Having been lucky enough to attend the previous two Expos, in Nagoya and Shanghai, I know how exciting an opportunity this is to showcase the best of what this city can offer. Never better the timing, then, to join in with this celebration of the place we call home. 

Come say hello: 
Pasta & Patchwork - Home
5 Comments

On conquering Systems

2/12/2015

16 Comments

 
If you were to ask me what the hardest thing about living abroad is (besides missing friends and family, of course), you’d get an answer involving the word “system”.

Bureaucratic System

Medical System

Taxation System (shudder)

All unyielding bastions of procedure and protocol so steeped in local traditions as to seem forever beyond the befuddled foreign arrival: surely if I learn enough of the language, or resort to quizzing my local friends before any System-related encounter or, god help me, try to find information online, I’ll conquer it?

But no, all too often the maze remains impenetrable. And, in Italy at least, depends very much on whether the person sat behind the counter on the day you drag your sorry and ungrammatical ass over with your forms and stamps and seals in hand is feeling benevolent or not. (Although fortunately benevolence actually seems to work wonders when you do find it - no Italian law or procedure is too rigid for a little bending, a little improvisation).

So Systems are the bane of our expat lives, and any encounter is to be dreaded. Encounters are unavoidable though: as of this week we are engaging with the Italian Education System. Because, you know, this boy is growing up. 
Picture
I think I need a little lie down simply after having written that, it feels so weighty and overwhelming…

But the crack is this: given the uncertainty over whether we’re staying or going, we need to carry on as though we’re staying. Which means making sure that, come September or January (depending on which entirely unsystematic System rule you apply), the Bean can go to preschool. Applications start round-about now. There are thousands of kids in Milan needing places.

God. Help. Us.

So far we have sort of managed to navigate Italy’s other Systems. My taxes get paid and my maternity allowance eventually materialised. The medical system, though a bit stuck in the fifties, got us through pregnancy and birth at very little cost to us. Fifty-seven thousand  signatures later, Mr P&P and I have a functioning bank account, an internet connection, a phone. There was a moment before we got married when I thought war might break out between the Belgian and Italian authorities over whose bit of pretty, official-looking paper was most official, but we got there in the end.

This, however. E-dyu-cay-shon.

Are there many more weighty decisions you make, as a parent? Is it harder as an expat parent, when you need to consider several languages and bear in mind your child might have to fit into another system elsewhere, at some point? Or is it simply hard for everyone full stop? 

I don’t know the answer to that, but I do know this: I’m wary of the traditional Italian education system. Although I feel snobbish saying that, I think it’s important to be honest about these things. I don’t like the idea of him going into a mainstream, traditional Italian school because I associate them with rigidity and conservatism. This is based on personal experience: as a former teacher I have taught within that system and I saw 7-year-olds dragging along school bags so full of books they couldn’t physically lift them, 9-year-olds being encouraged to take expensive English lessons and exams. The focus is on rote learning, stacks of homework, and getting good grades or the child is branded “cattivo” (bad). I’m aware that the Italian education system isn’t unique in this approach, nor is it necessarily ineffective for everyone, but it’s not what I want for the Bean. It doesn’t make sense to me.

What does make sense to me, on the other hand, is the Montessori method. And here we are incredibly fortunate: there are two Montessori schools within walking distance of our flat. We went to see one on Tuesday.

We think it’ll be a great fit. We believe the logical choice with regard to education for a boy who may need to move several more times before he’s done learning, who will probably grow up with a very fluid sense of culture and identity, is a method that focuses on the individual and which has been successful the world over. We might be wrong, of course, but for now we’re pretty convinced and we’re going ahead on that basis. We'll do the forms and sign fifty-eight thousand times, if that's what it takes.

As is always the case with these things, however, the school we saw is completely oversubscribed. We may not get a place. And if we don’t we shall have to engage with the mainstream Italian Education System after all.

Next week we have an interview for the Montessori school. Che sarà sarà, and all that, but PLEASE. Keep all your fingers and toes crossed for us, so that we may come out of this particular encounter with the System having made a positive and happy step to adulthood for the Bean. Please.

I think I need another little lie down now. 

Come say hello:
Pasta & Patchwork - Home

Picture
16 Comments

Here's to Kaleidoscope Kids

2/6/2015

6 Comments

 
The encounter started amicably enough.

We’re at a playground with the Bean. A little girl arrives at said playground with her dad. Bean starts eyeing up his bike protectively, Girl ignores him completely, Mr P&P and I exchange a look of hello and mutual tiredness with Dad. So far, so ordinary.

And then Bean and (much older) Girl try to climb up the steps to the slide at the same time and Dad says:
"Attenta alla bimba!" [Watch out for the girl]

La bimba.

*Sound the Dum-DUM of doom so commonly heard in Peppa Pig*

We’ve all done it, I’ve definitely done it too - before Christmas I mistook a girl with very little hair for a boy - and it is never meant to offend and always mortifying when you realise your mistake. I know this. But still.

Dum-DUM of doom and I rolled my eyes at Mr. P&P. Bim-ba?!

Because, you see, the Bean has been mistaken for a girl since he was teeny-tiny, and it is usually due to his long-ish blonde floppy hair or his clothes. Or a combination of both. I don’t dress him in pink frilly tutus, but on this particular day he was wearing rather fetching tights:

Here's to Kaleidoscope Kids by Pasta & Patchwork | Embracing diversity and rejection gender-sterotyping
Of course it was me who bought them as I love colour. Any colour (okay especially blues, yellows and greens). On our bed is what I think of as sunshine in fabric form, and as you can see I struggle with limited colour palettes in the living room too. On my wedding day I wore blue rather than white. Colour is amazing.
Sunshine Quilt
Bright cushions
So I may have bought these tights but he, THE BEAN loves these tights. And why wouldn’t he? They’re stripey and colourful. They’re soft and comfy. They’re the perfect toddler tights*.

And yet, to the dad in the playground and to many of the people we encounter as we go about our daily business, these are “girl’s tights”. Just like his yellow striped t-shirt, and his pale blue vest with the pink fish are "girl's clothes". PINK! On a boy?!

Although I appreciate that the “Pink Stinks” campaign is trying to fight the limitation and stereotyping associated with the “pinkfication of girlhood”, it’s not just pink that stinks, is it. “Only blue for boys” really, REALLY stinks as well. As does the idea that boys must play with cars and blocks not kitchens or dolls.

This whiff is something we run up against on an almost daily basis. A mum friend in our apartment block said her husband wouldn’t let her buy a toy kitchen for their son, lest he turn “weird” (?!). A teacher at my son’s nursery once asked me where I get all his “strange clothes” from (from the boys AND the girls sections, that's where).

You can tell yourself that these people are ignorant. You can tell yourself that their opinion doesn’t matter, only how you raise him. You can tell yourself it’s none of anybody else’s business if the Bean likes blue as well as pink, bright tights and toy kitchens as well as cars and power tools.

I tell myself these things but still I am so, so tired of it all. Their comments, their attitude, their underlying belief that things must be just so and that we are “strange” for daring to deviate. Running up against this every day gives me a bloody great headache. Whatever you want to call it - gender-stereotyping, role-stereotyping, sexism - at its best it's annoying and at its worst it's limiting, damaging, sinister. 

I refuse to bow to the Girls=Pink/Boys=Blue brigade, no matter how much the Italian nonnas tut at me.  I shop where I like, I give him toys of all stripes and colours of all sorts. This morning I sent him into nursery in a bright orange t-shirt and a green coat. Though he might one day decide to only wear black, at least for now my son is a Kaleidoscope Kid. And I’m proud of it.

(*In case you're wondering, the fetching tights in the top picture are from Frugi)
#KaleidoscopeKids compilation by Pasta & Patchwork
So who's with me? If you follow me on twitter or instagram, tag photos of your #KaleidoscopeKids, I'd love to see them! I'll do a round-up of my favourites next month. 

Come say hello:

Picture
6 Comments

Asymmetric Toddler Vest - Free Pattern

2/3/2015

1 Comment

 
't Was one of those days when I went to my favourite yarn store to get a couple of balls, and I came back with rather more. In my haul was a lovely and thick DK called Rainbow Red. 

Rainbow Red! The name alone... As soon as I saw it, I knew it was destined for a woolly toddler wonder, something to keep the Bean warm in the winter months but not too warm. Something to add deep, rich colour to the drabness of January. Add some pretty wooden buttons, an interesting asymmetric detail, and voila:
Asymmetric Toddler Vest | Free pattern by Pasta & Patchwork
Isn't it lovely? It's actually still a bit big for M, who's only just turned two, but no matter - after all  the work I put in it's nice to know he'll be able to wear it next year too!
It's thick but supple enough to allow him to move easily in it, and I've kept the border as simple as possible so as not to distract from the more intricate Trinity stitch. Full instructions on how to do this stitch are included below, but it is essentially a cluster of 3 Single Crochets, with the first SC of the cluster being made in the last SC of the previous cluster. 
The buttons were a steal at Hobbycraft, and I just adore them! 
Picture
Picture
Picture

Asymmetric Toddler Vest


Notes: 

US terms

5 mm (H) and 3.5 mm (E) hooks

Lanar DK wool & acrylic mix, ca. 400 yards (360 m)

Colour: Rainbow Red

Garment size: 3-4 y

Gauge: 10 cm = 12 rows

Stitches: Trinity stitch (see below for tutorial) - Tr.st.; single crochet - SC; chain stitch - ch.; slip stitch - sl.st. 
BACK PANEL

R1:
Begin with a starting chain of 44 stitches, of which the last will be used for the first st. of the next round.

R2:
SC 1 in the 2nd ch. from the hook, then make the first Trinity stitch: pull up a loop in the same ch. as that of the last SC, then pull up one loop each in the next two ch. Yarn over and pull through all three loops on the hook.  You now have a 3-SC cluster! [see pictures].
 
Picture
Picture
Picture
R2 (continued):
Ch. 1. To make the next Tr.st., pull up a loop in the same ch. of the last SC, then pull up one loop each in the next two ch. Yarn over and pull through all three loops on the hook. *Ch. 1, Tr.st. 1; repeat from * until last ch., then SC 1 in the same ch. as the 3rd SC of the last cluster. Turn (43st.)
Picture
R3:
Ch. 1, SC 1 in the last SC of the previous round, then Tr.st.. *Ch. 1, Tr.st. 1; repeat from * until last st.  SC 1 in the same st. as the 3rd SC of the last Tr.st. Turn (43st.)
R4-23: Repeat R3

Over the next 4 rows, we need to reduce by 6 stiches.

R24:
Ch. 1, SC 1 in the last SC of the previous round, then Tr.st. 1. DO NOT CH. 1, but move on to the next Tr.st. immediately. *Ch. 1, Tr.st.; repeat from * until 2 st. remain. DO NOT CH. 1, but move on to the last Tr.st. immediately [The image below shows where you should be skipping a ch. 1].
SC 1 in the same st. as the 3rd SC of the last Tr.st. Turn (41st.) 
Picture
R25:
Repeat row 24 (39st.)

R26:
Repeat row 3 (39st.)

R27:
Repeat row 24 (37st.)

R28-39: 
Repeat R3 (37st.)

Over the next 2 rows, we will make the collar and shoulders.

R40:
Ch1., then sl.st. 4 in the back loop only.
SC 1, then Tr.st. 1, ch.1, Tr.st.1. SC 1 in the same st. as the 3rd SC of the last Tr.st. [You will get a slant, as shown in the picture below]
Sl.st. 19 in the back loop only.
SC 1, then Tr.st. 1, ch.1, Tr.st.1. SC 1 in the same st. as the 3rd SC of the last Tr.st.
Sl.st. 4 in the back loop only. Turn (37st.)
Picture
R41:
Ch. 1, sl.st. 4 in the back loop only.
SC 1,  then Tr.st. 1, Ch. 2 (TWO!), Tr.st 1. SC 1 in the same st. as the 3rd SC of the last Tr.st. 
Sl.st. 19 in the back loop only.
SC 1, then Tr.st. 1, Ch. 2 (TWO!), Tr.st 1. SC 1 in the same st. as the 3rd SC of the last cluster.
Sl.st. 4 in the back loop only. Cut yarn and tie off. (37st.)
Picture
Now we’ll switch to the smaller hook and go back to the bottom of the panel to make the rim. I personally like a slightly tapered look, so there are 35 rather than 37 st. to this rim. This is a matter of preference, however, and you don’t need to stick to it. However, I would advise against going for more than 37 st. as it’ll just make the vest look weird…

R1:
Attach yarn at one end of the panel and ch.1. SC 35 into the bottom loops of the vest, skipping 2 along the way (anywhere but not two consecutively). Turn. (35 st.)

R2-4:
Ch.1 then SC into each st. of the previous row. At the end of the 4th round, cut yarn and tie off. (35 st.)

FRONT RIGHT PANEL (the asymmetric panel)

R1:
Begin with a starting chain of 30 stitches, of which the last will be used for the first st. of the next round.

R2:
SC 1 in the 2nd ch. from the hook, then Tr.st.. *Ch. 1, Tr.st. 1; repeat from * until last ch., then SC 1 in the same ch. as the 3rd SC of the last Tr.st. Turn (29st.)

R3:
Ch. 1, SC 1 in the last SC of the previous round, then Tr.st.. *Ch. 1, Tr.st. 1; repeat from * until last st.  SC 1 in the same st. as the 3rd SC of the last Tr.st. Turn (29st.)

R4-23: 
Repeat R3

Over the next 16 rows, we need to bring in one side to form the armhole, and make the other side slant diagonally to give this vest its asymmetric look.

R24:
Ch. 1, SC 1 in the last SC of the previous round, then Tr.st. 1. DO NOT CH. 1, but move on to the next Tr.st. immediately. *Ch. 1, Tr.st. 1; repeat from * until 2 st. remain. DO NOT CH. 1, but move on to the last Tr.st. immediately. SC 1 in the same st. as the 3rd SC of the last Tr.st. Turn (27st.)

R25:
Repeat row 24 (25st.)

R26:
Repeat row 3 (25st.)

R27:
Repeat row 24 (23st.)

R28:
Ch. 1, SC 1 in the last SC of the previous round, then Tr.st. 1. DO NOT CH. 1, but move on to the next Tr.st immediately. *Ch. 1, Tr.st. 1; repeat from * until last ch., then SC 1 in the same ch. as the 3rd SC of the last Tr.st. Turn (22st.)

R29:
Ch. 1, SC 1 in the last SC of the previous round, then Tr.st. 1. *Ch. 1, Tr.st. 1; repeat from * until 1 st. remains. Make a 2SC-tog by pulling up a loop in the same st. as the 3rd SC of the last Tr.st., inserting the hook into the last st. of the row, YO then pulling through all 3 loops on the hook [see picture]. Turn (21st.)
Picture
Picture
Picture
R30:
Repeat row 3.  Turn (21st.)

R31:
Ch. 1, SC 1 in the last SC of the previous round, then Tr.st. 1. *Ch. 1, Tr.st. 1; repeat from * until 2 st. remain. DO NOT CH. 1, but move on to the last Tr.st. immediately. SC 1 in the same st. as the 3rd SC of the last Tr.st. Turn (20st.)

R32:
Repeat row 28, but add one extra SC at end. Turn (19st.)

R33:
Repeat row 31. Turn (18st.)

R34:
Ch. 1, SC 1 in the last SC of the previous round, then Tr.st 1. *Ch. 1, Tr.st. 1; repeat from * until 1 st. remains. DO NOT CH. 1, but SC 1 into the 3rd SC of the previous cluster, then SC 1 into the last st. of the previous row [see picture]. Turn (17st.)
Picture
R35: 
Repeat row 3.  Turn (17st.)

R36:
Repeat row 28. Turn (16st.)

R37:
Repeat row 29. Turn (15st.)

R38:
Repeat row 3. Turn (15st.)

R39:
Repeat row 31. Turn (14st.)

Over the next 2 rows, we will make the collar and shoulder.

R40: 
Ch. 1, sl.st. 5 in the back loop only.
SC 1, then Tr.st. 1, ch. 1, Tr.st. 1. SC 1 in the same st. as the 3rd SC of the last Tr.st.
Sl.st. 4 in the back loop only. Turn (14st.)

R41:
Ch. 1, sl.st. 4 in the back loop only.
SC 1, then Tr.st. 1, ch. 2 (TWO!), Tr.st. 1. SC 1 in the same st. as the 3rd SC of the last Tr.st.
Sl.st. 5 in the back loop only. Cut yarn and tie off (14st.)

Now we’ll switch to the smaller hook and go back to the bottom of the panel to make the rim.

R1: 
Attach yarn at one end of the panel and ch.1. 
SC 27 into the bottom loops of the vest, skipping 2 along the way (anywhere). Turn. (27 st.)

R2-4:
Ch.1 then SC into each st. of the previous row. At the end of the 4th round, cut yarn and tie off. (27 st.)

Continuing with the smaller hook, we’ll now make the side rim with the button holes.

R1:
Attach yarn at one end of the panel and ch.1. 
SC 32 into the side edge of the vest, until you get to the “bump” where the slanted part of the panel starts. SC 3 together into the corner, the SC 15 into the slanted side of the panel. Turn (55st.)
Picture
R2:
Ch.1, SC 1 each into the first 16 st. of the  previous row. SC 2 in the 17th st., SC 2 in the 18th st.
Continue making SC 1 into each st. of the previous row. Turn (57st.)

R3:
Ch. 1, SC 1 each into the first 32 st. of the  previous row. SC 2 in the 33rd st., then continue making SC 1 into each st. of the previous row. Turn (58st.)

R4:
Ch.1, SC 1 each into the first 19 st. of the  previous row. SC 2 in the 20th st., then continue making SC 1 into each st. of the previous row. Turn (59st.)

R5:
Ch. 1, SC 1 each into the first 33 st. of the  previous row. SC 2 in the 34th st., then SC 1 into the next st.
Skip 3 st. and ch. 3, SC 4, skip 3 and ch. 3, SC 4, skip 3 and ch. 3, SC 1.
Carry on to the collar and shoulder of the panel: sl.st. 1 into the side of the rows of SCs and each st. of the collar & shoulder to make the edge neat. 
Picture

FRONT LEFT PANEL

R1:
Begin with a starting chain of 18 stitches, of which the last will be used for the first st. of the next round.

R2:
SC 1 in the 2nd ch. from the hook, then Tr.st. 1. *Ch. 1, Tr.st. 1; repeat from * until last ch., then SC 1 in the same ch. as the 3rd SC of the last Tr.st. Turn (17st.)

R3:
Ch. 1, SC 1 in the last SC of the previous round, then Tr.st. 1. *Ch. Tr.st. 1; repeat from * until last ch., then SC 1 in the same ch. as the 3rd SC of the last Tr.st. Turn (17st.)

R4-23: 
Repeat R3

Over the next 16 rows, we need to bring in one side to form the armhole, while the other side remains straight.

R24:
Ch. 1, SC 1 in the last SC of the previous round, then Tr.st 1. DO NOT CH. 1, but move on to the next Tr.st. immediately. *Ch. 1, Tr.st. 1; repeat from* until last ch., then SC 1 in the same ch. as the 3rd SC of the last Tr.st. Turn (16st.)

R25:
Ch. 1, SC 1 in the last SC of the previous round, then Tr.st. 1. *Ch. 1, Tr.st. 1; repeat from * until 1 st. remains. Make a 2SC-tog by pulling up a loop in the same st. as the 3rd SC of the last Tr.st., inserting the hook into the last st. of the row, YO then pulling through all 3 loops on the hook. Turn (15st.)

R26:
Repeat row 3 (15st.)

R27:
Ch. 1, SC 1 in the last SC of the previous round, then Tr.st. 1. *Ch. 1, Tr.st. 1; repeat from * until 2 st. remain. DO NOT CH. 1, but move on to the last Tr.st. immediately. SC 1 in the same st. as the 3rd SC of the last Tr.st. Turn (14st.)

R28-39:
Ch. 1, SC 1 in the last SC of the previous round, then Tr.st 1. *Ch. 1, Tr.st. 1; repeat from * until 1 st. remains. DO NOT CH. 1, but SC 1 into the 3rd SC of the previous cluster, then SC 1 into the last st. of the previous row. Turn (14st.)
Over the next 2 rows, we will make the collar and shoulder.

R40: 
Ch. 1, sl.st. 4 in the back loop only.
SC 1, then Tr.st.1, ch. 1, Tr.st.1. SC 1 in the same st. as the 3rd SC of the last Tr.st.
Sl.st. 5 in the back loop only. Turn (14st.)

R41:
Ch. 1, sl.st. 5 in the back loop only.
SC 1, then Tr.st.1, ch. 2 (TWO!), Tr.st.1. SC 1 in the same st. as the 3rd SC of the last Tr.st.
Sl.st. 4 in the back loop only. Cut yarn and tie off (14st.)

Now we’ll switch to the smaller hook and go back to the bottom of the panel to make the rim.

R1: 
Attach yarn at one end of the panel and ch.1. 
SC 15 into the bottom loops of the vest, skipping 2 along the way (anywhere). Turn. (15st.)

R2-4:
Ch.1 then SC 1 into each st. of the previous row. At the end of the 4th round, cut yarn and tie off. (15st.)

Continuing with the smaller hook, we’ll now make the side rim.

R1:
Attach yarn at the top end of the panel and ch.1. SC 44 into the side edge of the vest. Turn (44st.)

R2-4:
Ch.1 then SC 1 into each st. of the previous row. At the end of the 4th round, cut yarn and tie off. (44st.)
Carry on to the collar and shoulder of the panel: sl.st. 1 into the side of the rows of SCs and each st. of the collar & shoulder to make the edge neat. 

Asymmetric Toddler Vest | Free pattern by Pasta & Patchwork
And there are your three panels! Weave in any ends, then block all three panels (really, do - it makes a huge difference to the final finish) and sew them together using a wool needle. Attach the buttons, remembering they go on a diagonal! All done. 
Written pattern copyright Eline Alcocer 2015. You are welcome to make and use this pattern as you wish, but please do not sell the pattern nor claim the pattern as your own. Please link back to this page if you write about the pattern in any way. Thank you and happy crocheting!

Come say hello:

I'm linking up with Moogly and Petals to Picots for Hookin on Hump Day #88
1 Comment

{The Ordinary Moments} #30 - Toddler At Work

2/2/2015

10 Comments

 
Shhh. 

Nice and quiet, not too loud.

There's a Toddler At Work. Come closer and take a look:
Sometimes the Work happens in an instant, the purpose of which can only be understood by said Toddler.
Peppa Pig stickers
Sometimes we catch the Toddler red-penned.
Toddler stamps
Sometimes the purpose of the Work is altogether more useful, and we can but marvel and this very no-longer-a-baby, determined and skillful little person in front of us.
Toddler peeling an egg
Toddler peeling an egg - close-up
Sometimes the Toddler Works on essential life skills (though, on this rare occasion, thankfully without a life-threatening implement).
Playdough
Sometimes the Toddler's Work involves great discoveries...
Toddler painting
... which may result in pretty pictures...
Painting
... or alternatively a blue smurf who needs a bath. 
Finger paint
Whatever the case may be, is there any sight more lovely than the Toddler about his Ordinary Work? I don't think so. 

Come say hello: 

Picture
10 Comments
    Picture
    Hello! I'm Eline, and I've recently moved to a new corner of the internet: 
    www.emmyandlien.com/
    ​
    Do come and say hello!

    Read more:
    Picture
    Picture
    Picture
    Picture
    Picture
    Picture
    Picture
    Picture
    Picture

    Archives

    February 2016
    January 2016
    December 2015
    November 2015
    October 2015
    September 2015
    August 2015
    July 2015
    June 2015
    May 2015
    April 2015
    March 2015
    February 2015
    January 2015
    December 2014
    November 2014
    October 2014
    September 2014
    August 2014
    July 2014
    June 2014
    May 2014
    April 2014
    March 2014
    February 2014
    January 2014
    December 2013


    Hookin on Hump Day
    Picture
Powered by Create your own unique website with customizable templates.