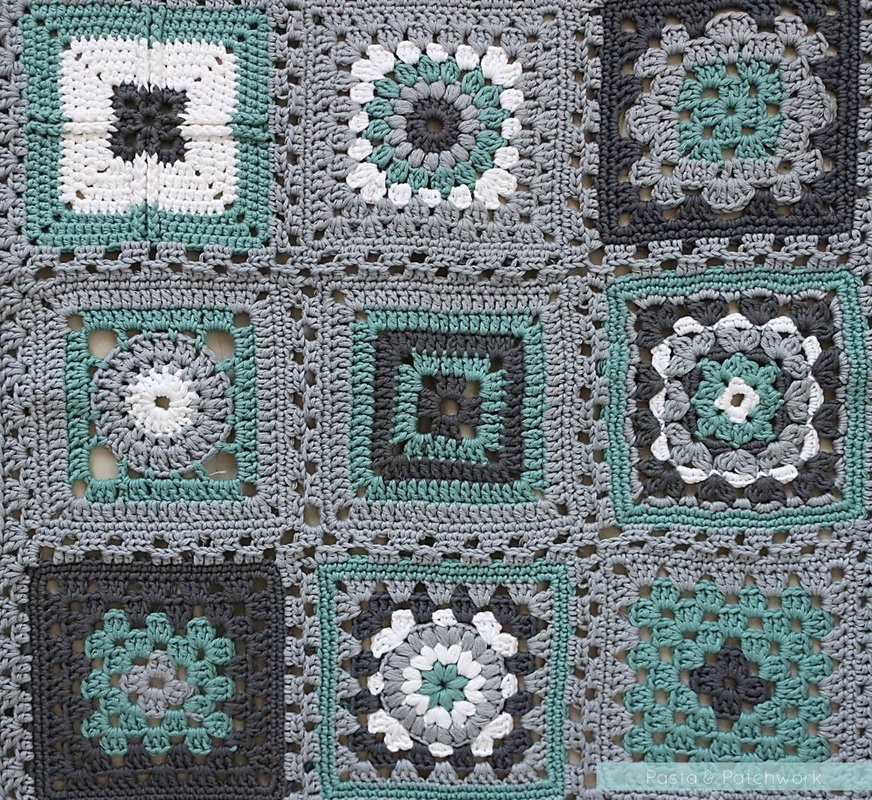
And on it goes, granny square after granny square… Actually progress has been rather slow as I’ve gotten distracted with other projects (nobody has just one WIP, right?!), but the green squares are now all done and joined. The blue and light pink ones are also getting there, so I’ve just the fuchsia and yellow ones to do.
I’m still dithering over how to bring everything together, seeing as I didn’t plan this “crochet meets patchwork” blanket very well… Okay I didn’t plan it at all, but that’s part of the fun!
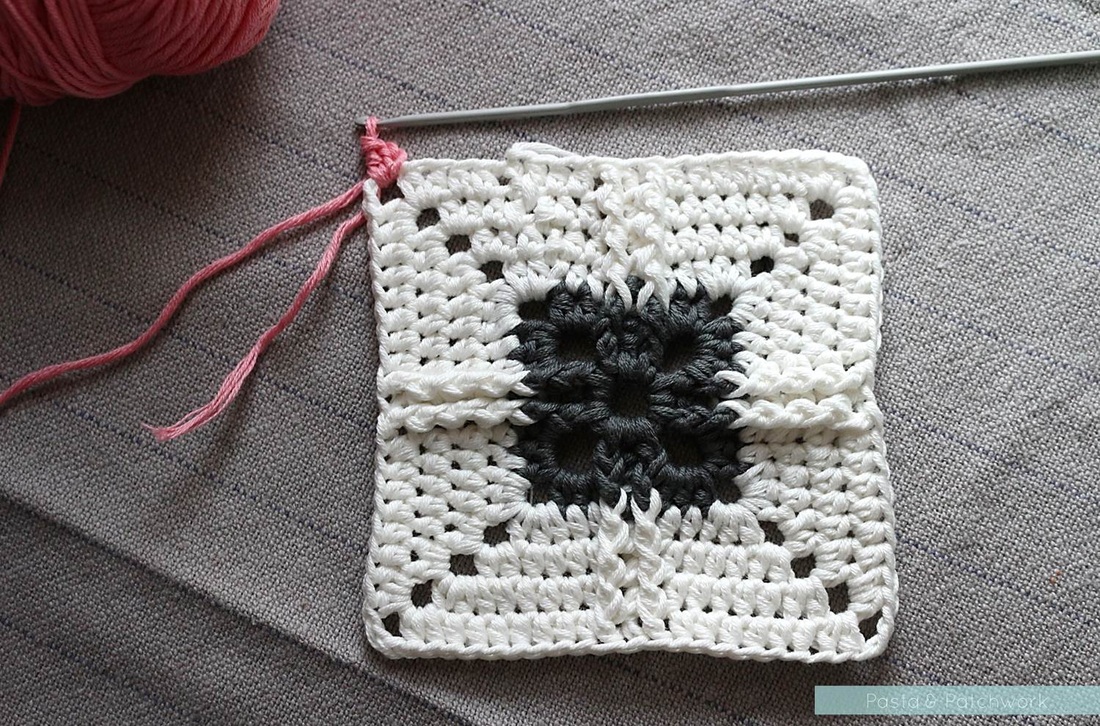
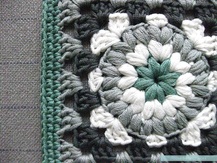
In any case, today I’m sharing a second square from the green section. It's the first square I came up with for this blanket, and it's still one of my favourites.
In any case, today I’m sharing a second square from the green section. It's the first square I came up with for this blanket, and it's still one of my favourites.
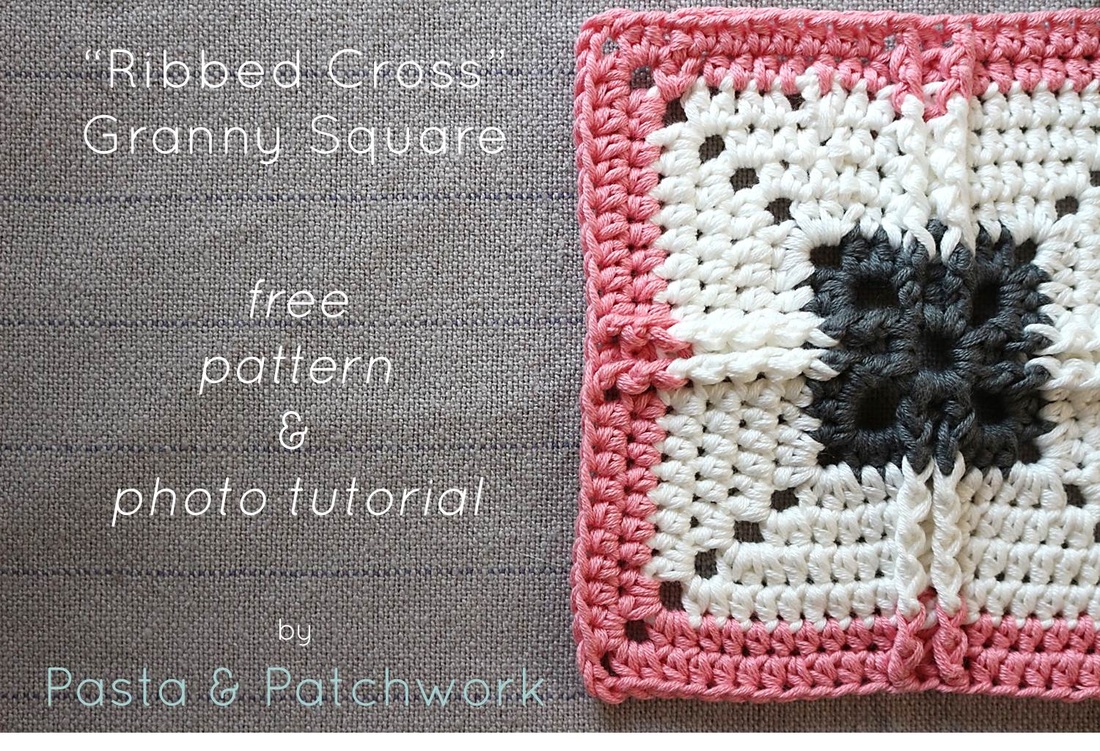
The cross is achieved using a combination of Front Post and Back Post Treble Crochet stitches (Double Crochet if you're in the US). These stitches are a bit fiddly but they're absolutely worth trying - they have such a great texture! I've included an explanation of how to do them below, but you might also like to watch a video on the front post TC/DC and a video on the back post TC/DC first.
"Ribbed Cross" Granny Square
Notes:
UK terms (with US terms in brackets)
2.5 mm (C) hook
Natura 100% cotton - fingering yarn
Colours: Aswan (A), Ivory (B), Topaze (C)
square size: 10 cm x 10 cm (ca. 4" by 4")
stitches: Front Post treble crochet - FPTC (Front Post double crochet - FPDC) Instructions below; Back Post treble crochet - BPTC (Back Post double crochet - FPDC) Instructions below; treble crochet - TC (double crochet - DC); double crochet - DC (single crochet - SC); chain - ch (chain stitch - ch); slip stitch - sl.st. (sl.st.)
Round 1:
With colour A make a starting chain of 7, then make into a circle with a sl.st into the first ch.
Round 2:
Ch 6, then TC (DC) 3 around the circle you made in Round 1, ch 3, TC (DC) 3 around the circle you made in Round 1, ch 3, TC (DC) 3 around the circle you made in Round 1, ch 3, TC (DC) 2 around the circle you made in Round 1. Join to the 3rd ch with a sl.st. (i.e. a traditional granny square round).
Round 3:
Ch 2, then HTC (HDC) 2, ch. 3, HTC (HDC) 3 around the ch 3 that makes up the corner.
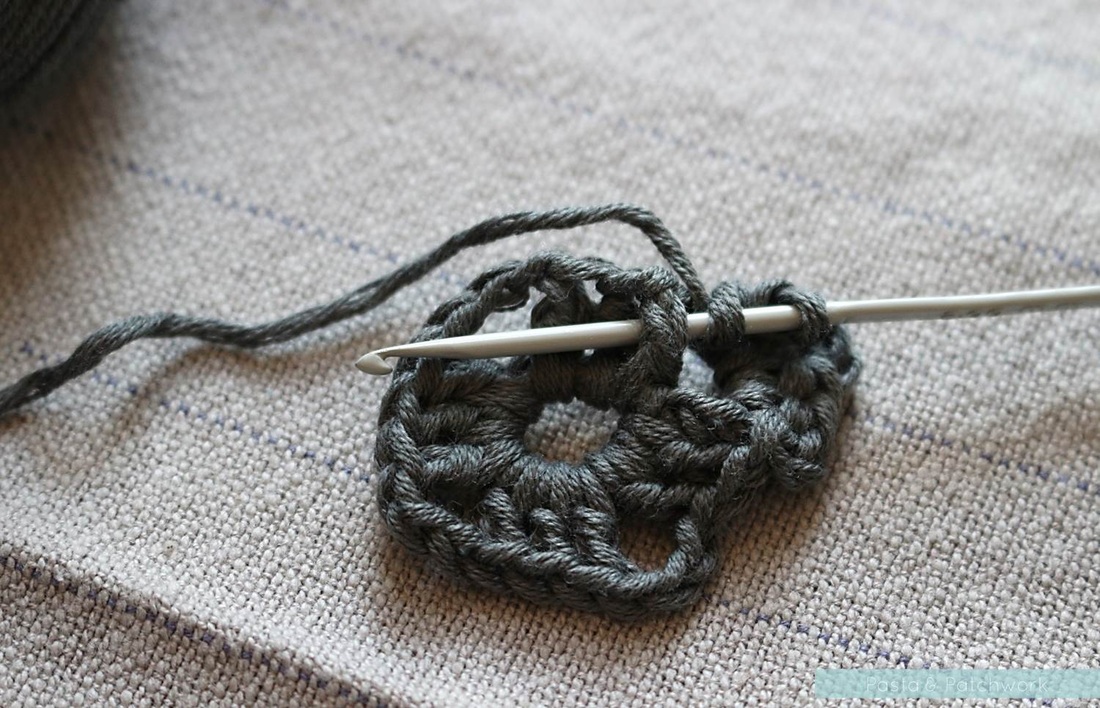
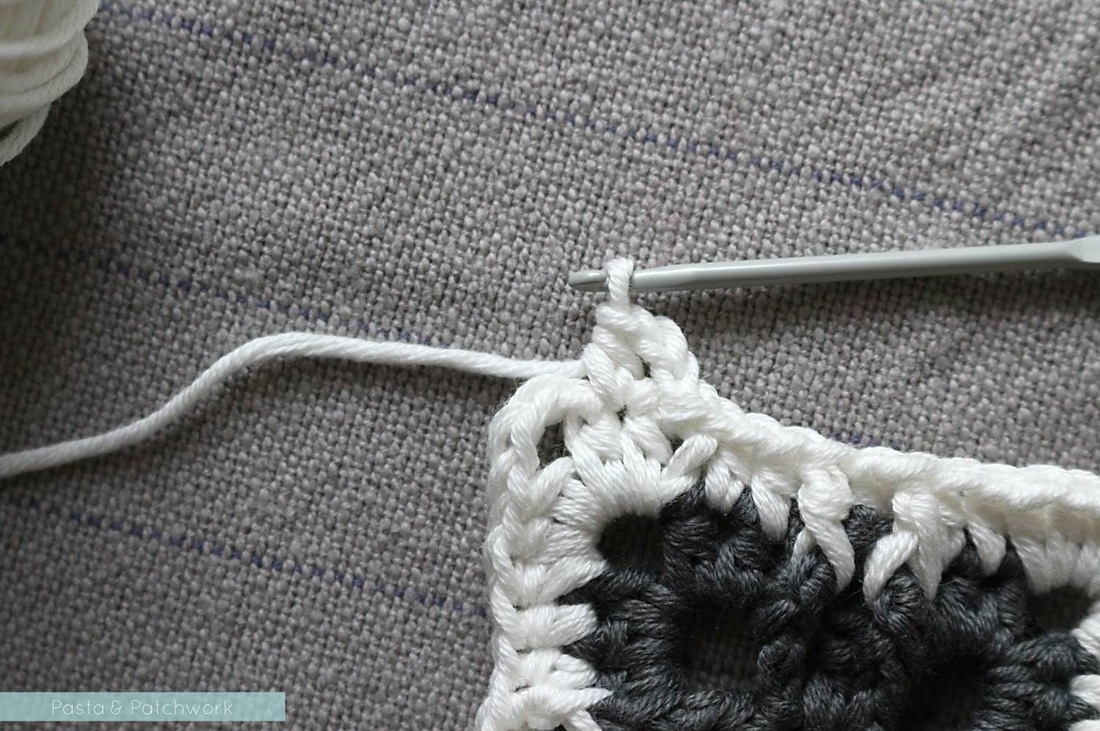
Now work a Front Post TC (Front Post DC) as follows: YO, insert hook from right to left behind the “post” of the TC (DC) of the previous row [see picture below]; the “post” is in front of your hook now. YO and pull up a loop, YO and pull through the first two loops on the hook, YO and pull through the two loops on the hook to finish the stitch.
For the next TC (DC) of the previous round, we want to do a BACK Post TC (Back Post DC): YO and insert hook from right to left in front of the “post” of the TC (DC) of the previous row [see picture below]; the “post” is now behind the hook. YO and pull up a loop, YO and pull through the first two loops on the hook, YO and pull through the two loops on the hook to finish the stitch.
For the next TC (DC) of the previous round, work another FPTC (FPDC).
*HTC (HDC) 3, ch 3, HTC (HDC) 3. When you get to the next set of 3 TCs (DCs) of the previous row, FPTC (FPDC) - BPTC (BPDC) - FPTC (FPDC); repeat from * until you’ve gone all the way round. Join to the 2nd ch. with a sl.st. Fasten off.
With colour A make a starting chain of 7, then make into a circle with a sl.st into the first ch.
Round 2:
Ch 6, then TC (DC) 3 around the circle you made in Round 1, ch 3, TC (DC) 3 around the circle you made in Round 1, ch 3, TC (DC) 3 around the circle you made in Round 1, ch 3, TC (DC) 2 around the circle you made in Round 1. Join to the 3rd ch with a sl.st. (i.e. a traditional granny square round).
Round 3:
Ch 2, then HTC (HDC) 2, ch. 3, HTC (HDC) 3 around the ch 3 that makes up the corner.
Now work a Front Post TC (Front Post DC) as follows: YO, insert hook from right to left behind the “post” of the TC (DC) of the previous row [see picture below]; the “post” is in front of your hook now. YO and pull up a loop, YO and pull through the first two loops on the hook, YO and pull through the two loops on the hook to finish the stitch.
For the next TC (DC) of the previous round, we want to do a BACK Post TC (Back Post DC): YO and insert hook from right to left in front of the “post” of the TC (DC) of the previous row [see picture below]; the “post” is now behind the hook. YO and pull up a loop, YO and pull through the first two loops on the hook, YO and pull through the two loops on the hook to finish the stitch.
For the next TC (DC) of the previous round, work another FPTC (FPDC).
*HTC (HDC) 3, ch 3, HTC (HDC) 3. When you get to the next set of 3 TCs (DCs) of the previous row, FPTC (FPDC) - BPTC (BPDC) - FPTC (FPDC); repeat from * until you’ve gone all the way round. Join to the 2nd ch. with a sl.st. Fasten off.
Front Post TC (Front Post DC) - YO and insert hook behind the "post"of next st.
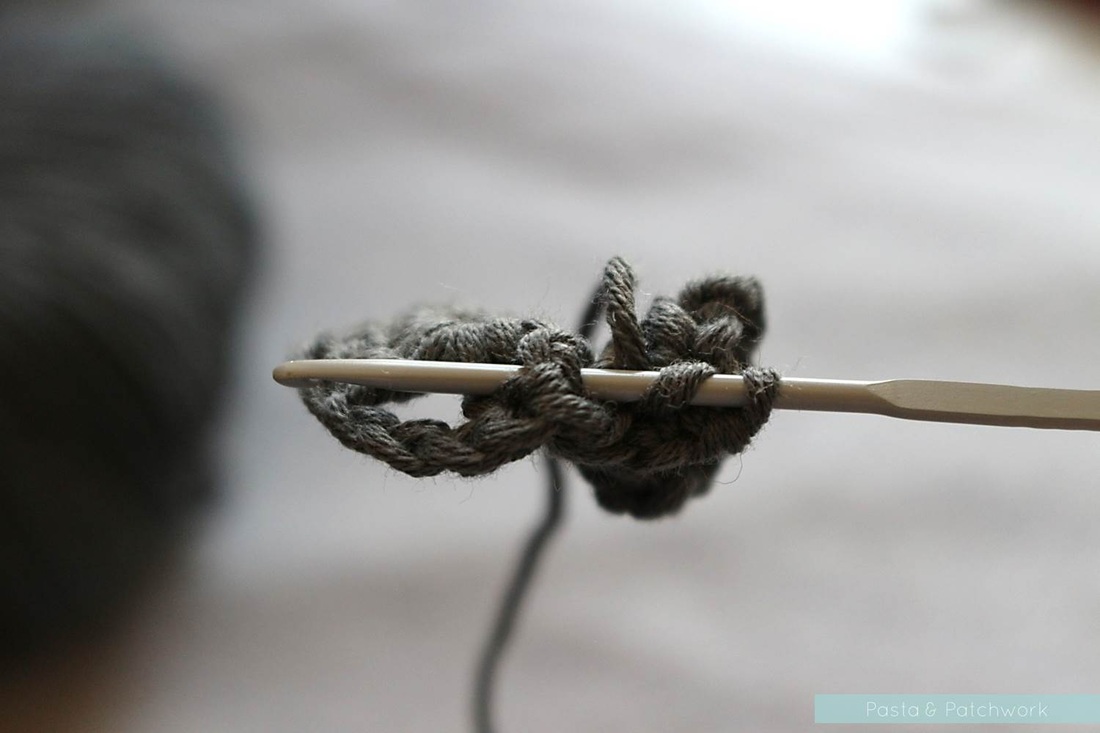
Back Post TC (Back Post DC) - YO and insert hook in front of the "post" of next st.

Round 4:
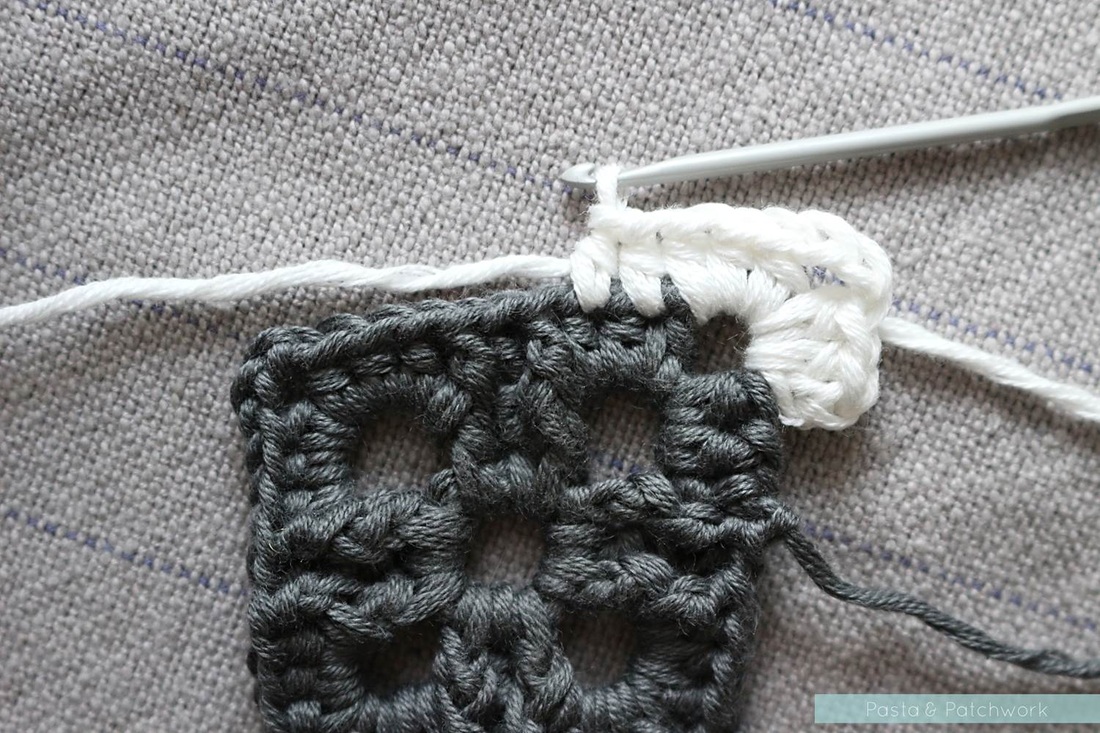
Attach colour B onto a corner and ch 2. HTC (HDC) 2, ch 3, HTC (HDC) 3 to go round the corner. *HTC (HDC) 1 into each of the next 2 st. When you get to a set of Front and Back Post st., work the same into them again: FPTC (FPDC) - BPTC (BPDC) - FPTC (FPDC). HTC (HDC) 1 into each of the next 2 st. HTC (HDC) 3, ch 3, HTC (HDC) 3 on the corner.; repeat from * until you’ve done the 4th set of Front/Back Post stitches, then HTC (HDC) 1 into each of the next 2 st. Join to the 2nd ch with a sl.st.
Attach colour B onto a corner and ch 2. HTC (HDC) 2, ch 3, HTC (HDC) 3 to go round the corner. *HTC (HDC) 1 into each of the next 2 st. When you get to a set of Front and Back Post st., work the same into them again: FPTC (FPDC) - BPTC (BPDC) - FPTC (FPDC). HTC (HDC) 1 into each of the next 2 st. HTC (HDC) 3, ch 3, HTC (HDC) 3 on the corner.; repeat from * until you’ve done the 4th set of Front/Back Post stitches, then HTC (HDC) 1 into each of the next 2 st. Join to the 2nd ch with a sl.st.
Round 5:
Sl.st. 1 around the first HTC (HDC) of the previous row, then ch. 2. HTC (HDC) into the next st.
*HTC (HDC) 2, ch 3, HTC (HDC) 2 on the corner. HTC (HDC) 1 into each of the next 4 st. When you get to a set of Front and Back Post st., work the same into them again: FPTC (FPDC) - BPTC (BPDC) - FPTC (FPDC). HTC (HDC) 1 into each of the next 4 st.; repeat from * until you’ve gone all the way round. Join to the 2nd ch with a sl.st.
Round 6:
Sl.st. 1 around the first HTC (HDC) of the previous row, then ch. 2. HTC (HDC) into each of the next 2 st. *HTC (HDC) 2, ch 3, HTC (HDC) 2 on the corner. HTC (HDC) 1 into each of the next 5 st. When you get to a set of Front and Back Post st., work the same into them again: FPTC (FPDC) - BPTC (BPDC) - FPTC (FPDC). HTC (HDC) 1 into each of the next 5 st.; repeat from * until you’ve gone all the way round. Join to the 2nd ch with a sl.st.
Round 7:
Sl.st. 1 around the first HTC (HDC) of the previous row, then ch. 2. HTC (HDC) into each of the next 2 st. *HTC (HDC) 2, ch 3, HTC (HDC) 2 on the corner. HTC (HDC) 1 into each of the next 6 st. When you get to a set of Front and Back Post st., work the same into them again: FPTC (FPDC) - BPTC (BPDC) - FPTC (FPDC). HTC (HDC) 1 into each of the next 6 st.; repeat from * until you’ve gone all the way round. Join to the 2nd ch with a sl.st. Fasten off.
Round 8:
Attach colour C onto a corner and ch 2. HTC (HDC) 1, ch 3, HTC (HDC) 2 to go round the corner. *HTC (HDC) 1 into each of the next 7 st. When you get to a set of Front and Back Post st., work the same into them again: FPTC (FPDC) - BPTC (BPDC) - FPTC (FPDC). HTC (HDC) 1 into each of the next 7 st. HTC (HDC) 2, ch 3, HTC (HDC) 2on the corner.; repeat from * until you’ve done the 4th set of Front/Back Post stitches, then HTC (HDC) 1 into each of the next 2 st. Join to the 2nd ch with a sl.st.
Round 9:
Sl.st. 1 around the first HTC (HDC) of the previous row, then ch. 2. *HTC (HDC) 2, ch 3, HTC (HDC) 2 on the corner. HTC (HDC) 1 into each of the next 8 st. When you get to a set of Front and Back Post st., work the same into them again: FPTC (FPDC) - BPTC (BPDC) - FPTC (FPDC). HTC (HDC) 1 into each of the next 6 st.; repeat from * until you’ve gone all the way round. Join to the 2nd ch with a sl.st. Fasten off.
Sl.st. 1 around the first HTC (HDC) of the previous row, then ch. 2. *HTC (HDC) 2, ch 3, HTC (HDC) 2 on the corner. HTC (HDC) 1 into each of the next 8 st. When you get to a set of Front and Back Post st., work the same into them again: FPTC (FPDC) - BPTC (BPDC) - FPTC (FPDC). HTC (HDC) 1 into each of the next 6 st.; repeat from * until you’ve gone all the way round. Join to the 2nd ch with a sl.st. Fasten off.
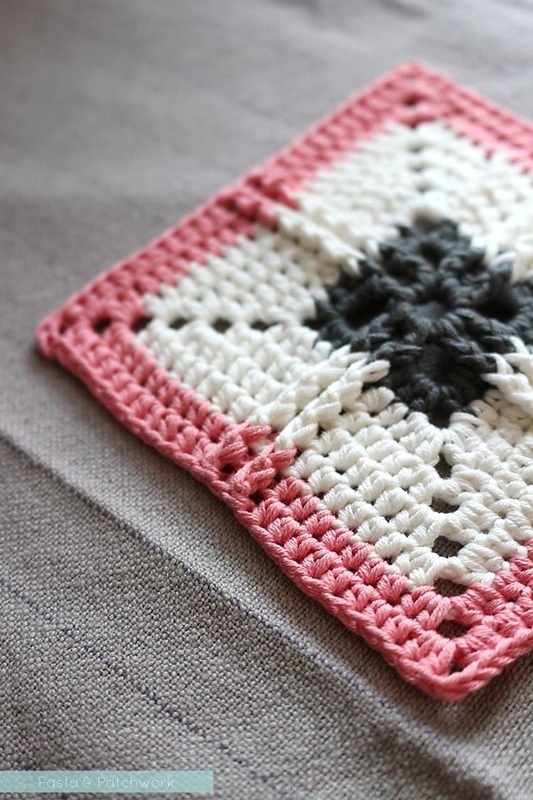
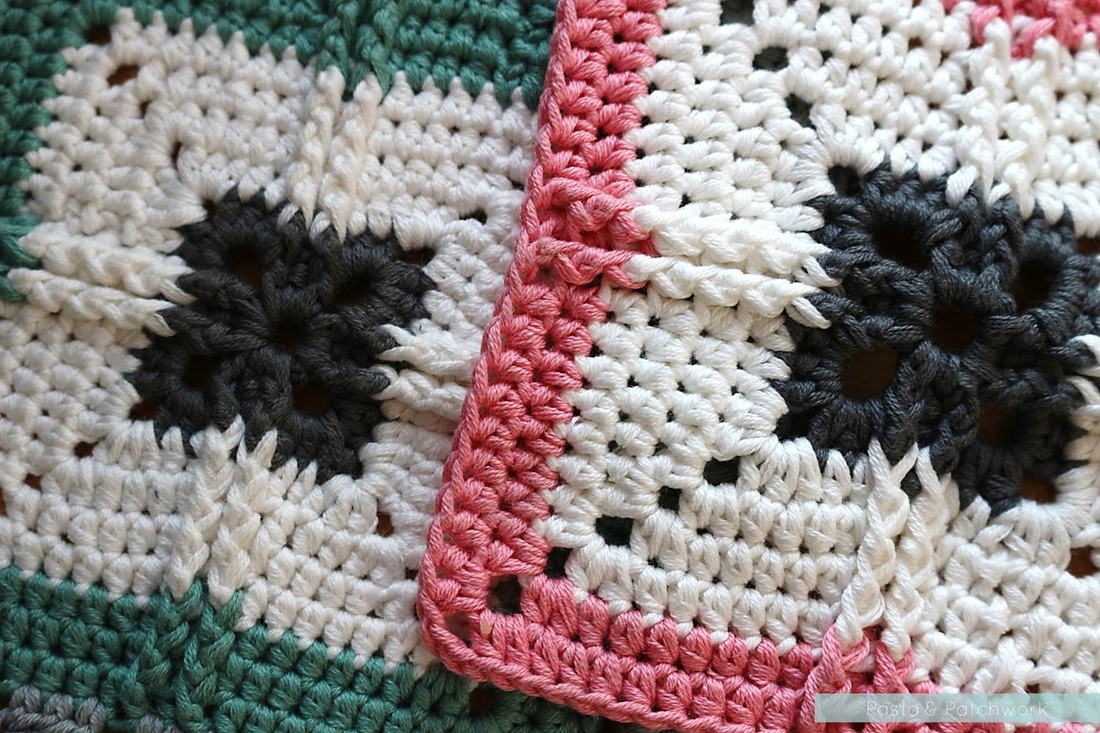
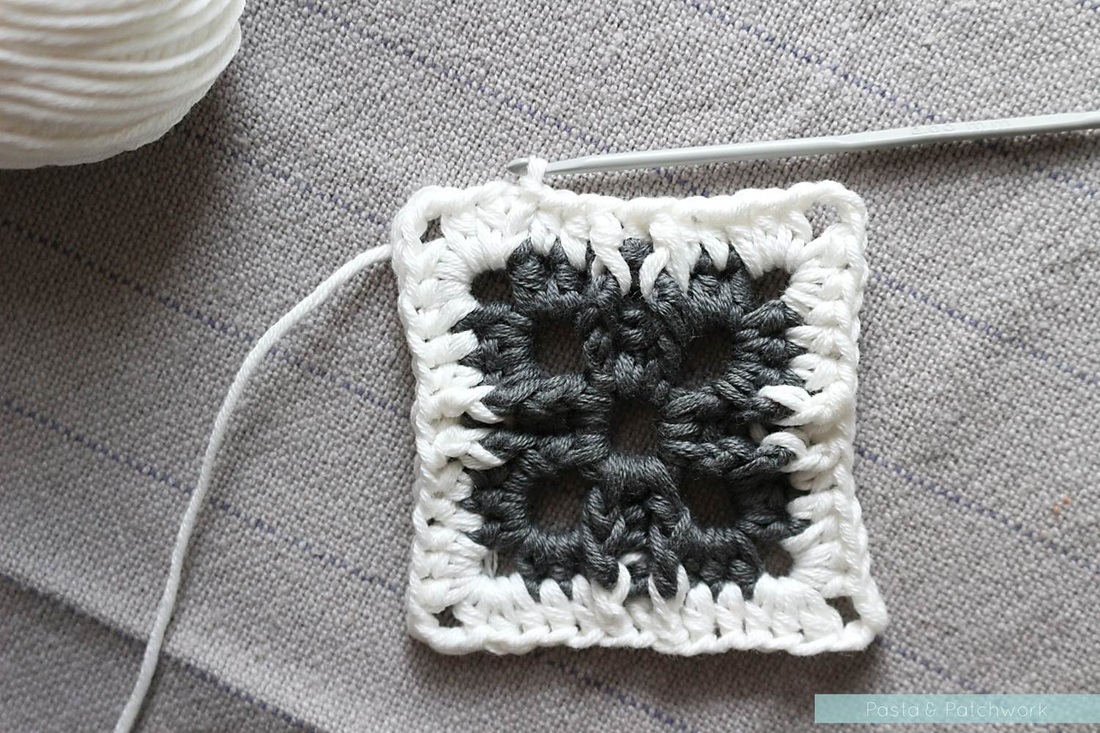
Done! As well as a blanket square, this pattern works very well as a coaster. You could also do a whole bunch to make a cushion cover, as it's nice and stiff thanks to the cotton.
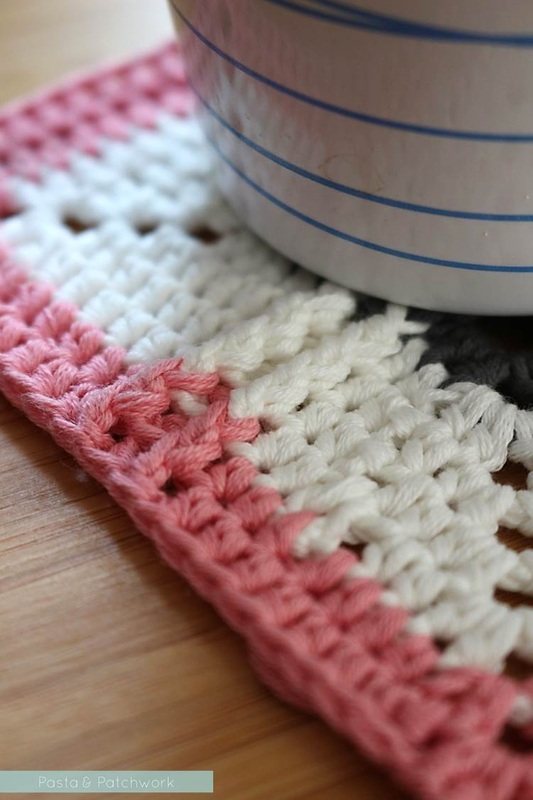
When you’ve finished your square it’s a good idea to block it, as it’ll look much neater and, well, square!
Written pattern copyright Eline Alcocer 2015.
You are welcome to make and use this pattern as you wish, but please do not sell the pattern nor claim the pattern as your own.
You are welcome to sell items made using this pattern as long as the designer, Eline Alcocer, is clearly credited at the Point of Sale.
Please link back to this page if you write about the pattern in any way.
You may not reproduce, either partially or in full, any of the photos or the text contained in this post without obtaining written permission from me first.
Thank you and happy crocheting!
Like this pattern? Try the "Triple Puff" Granny Square too!
Come say hello:

I'm linking up with Moogly and Petals to Picots for Hookin on Hump Day #89