If you like crochet, you won’t have failed to notice that poncho fever has swept across the UK: magazine Simply Crochet published a pattern for a fringed, collared number and it versions of it have been popping up everywhere.
So who was I to resist joining in? It had been a while since I’d made anything for myself, and I had enough yarn left over from other projects.
So who was I to resist joining in? It had been a while since I’d made anything for myself, and I had enough yarn left over from other projects.
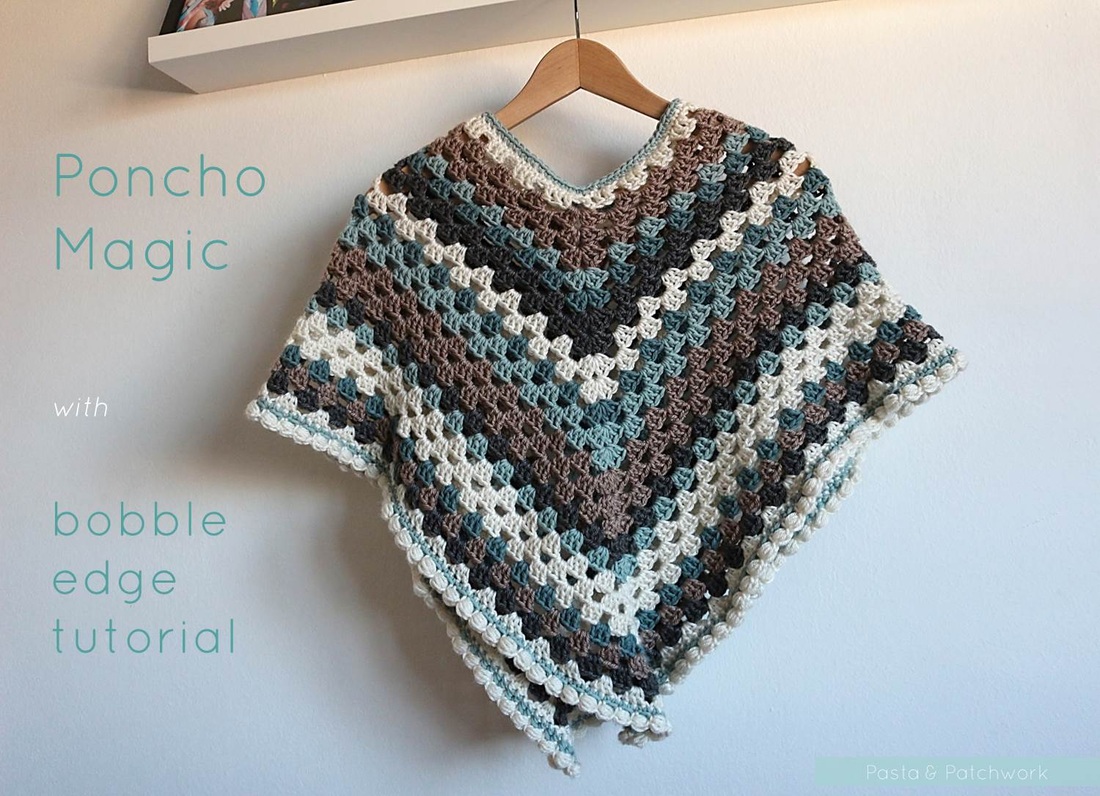
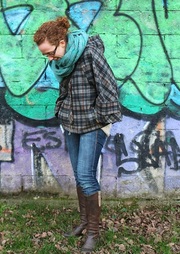
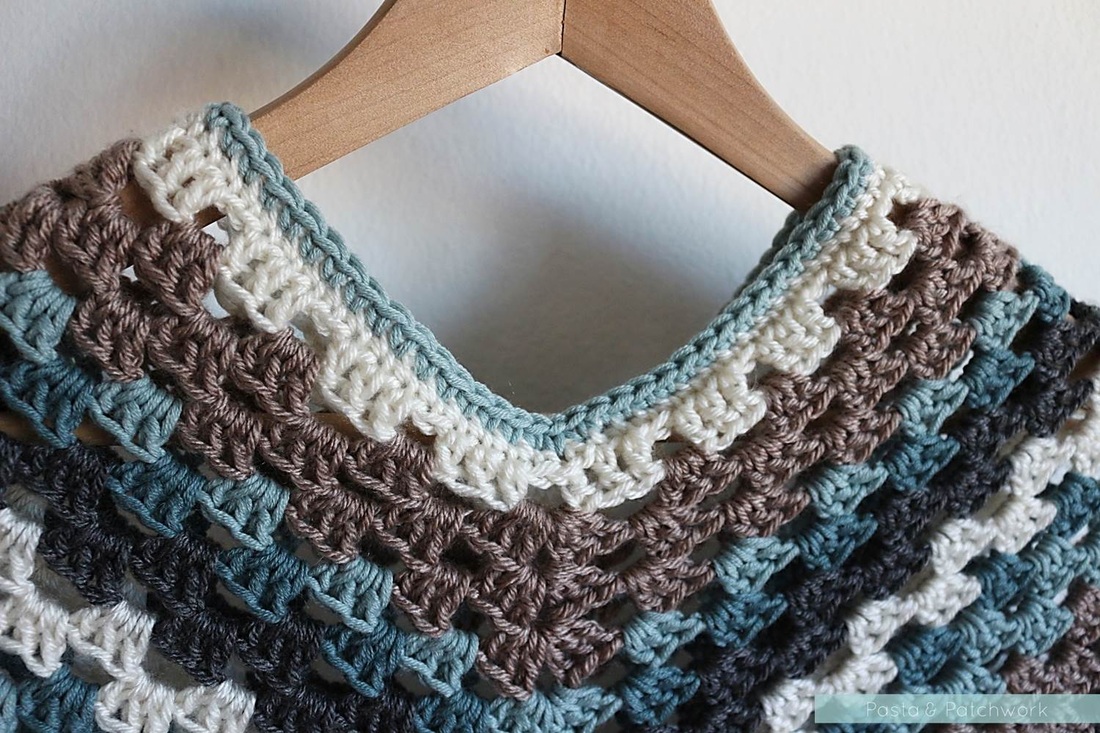
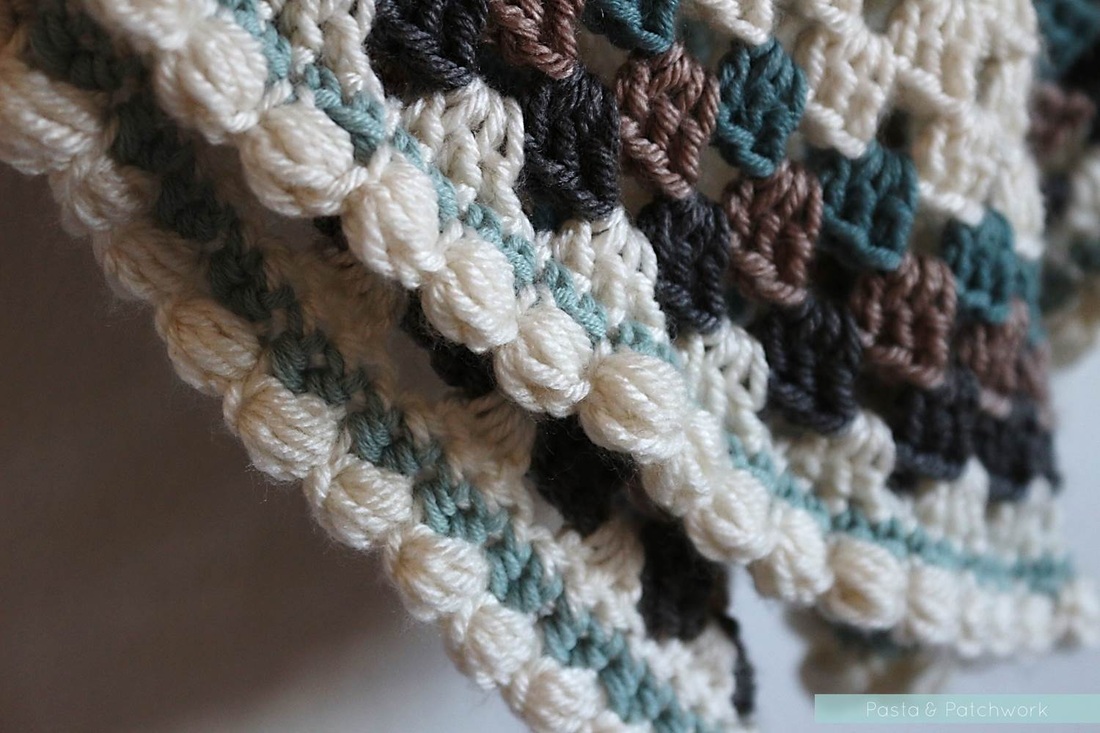
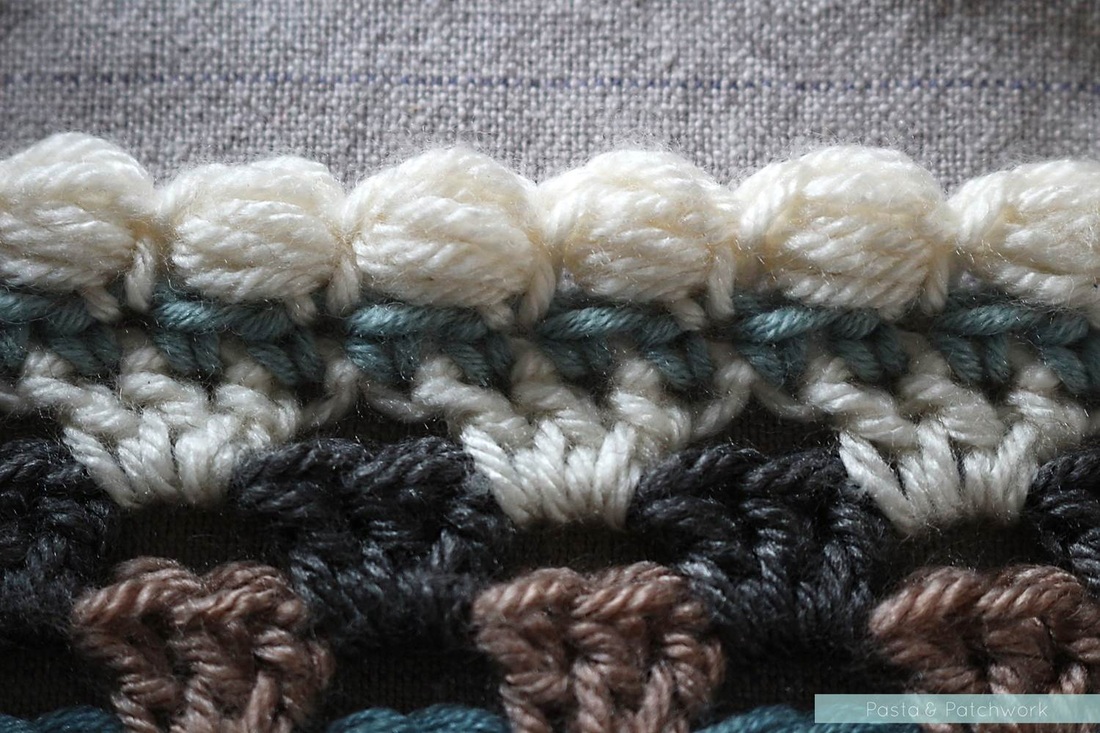
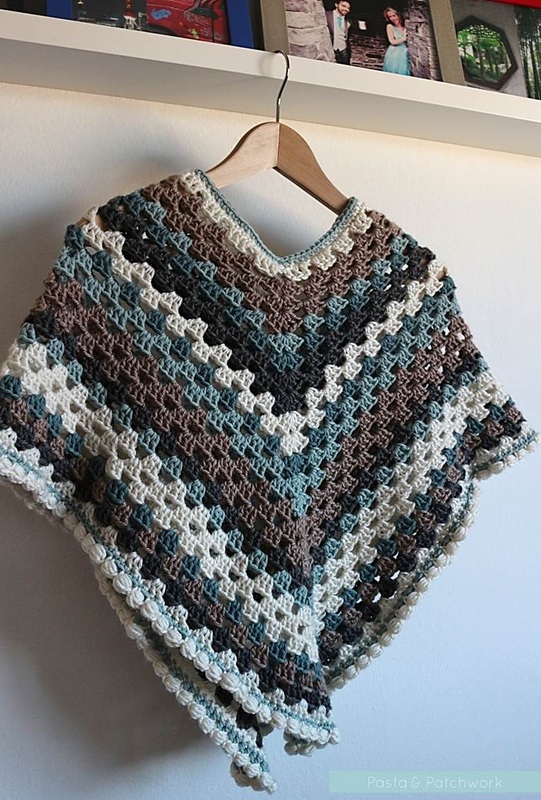
In the end my poncho turned out quite different to the Simply Crochet one; I left out the ribbed collar as I wanted something a bit more lightweight, and I thought a bobbled edge was more “me” than the fringe. The lack of fringe makes it a bit shorter (it sits just above my elbows), but as I like to wear it around the house I think this actually makes it more practical.
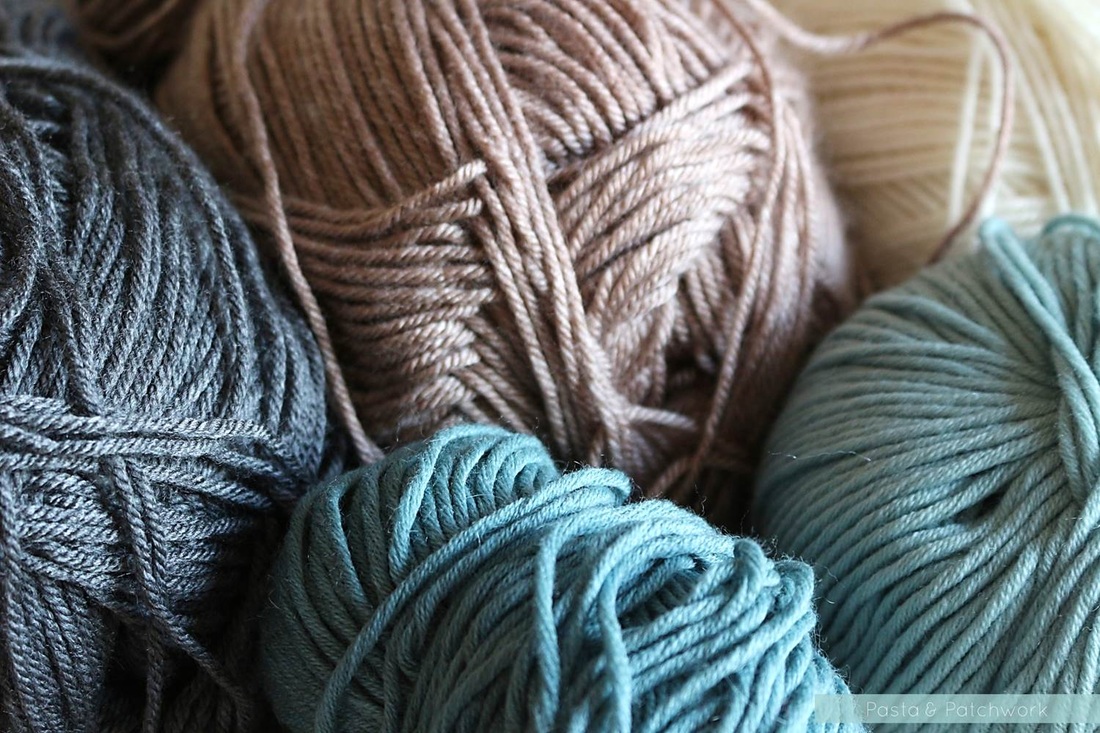
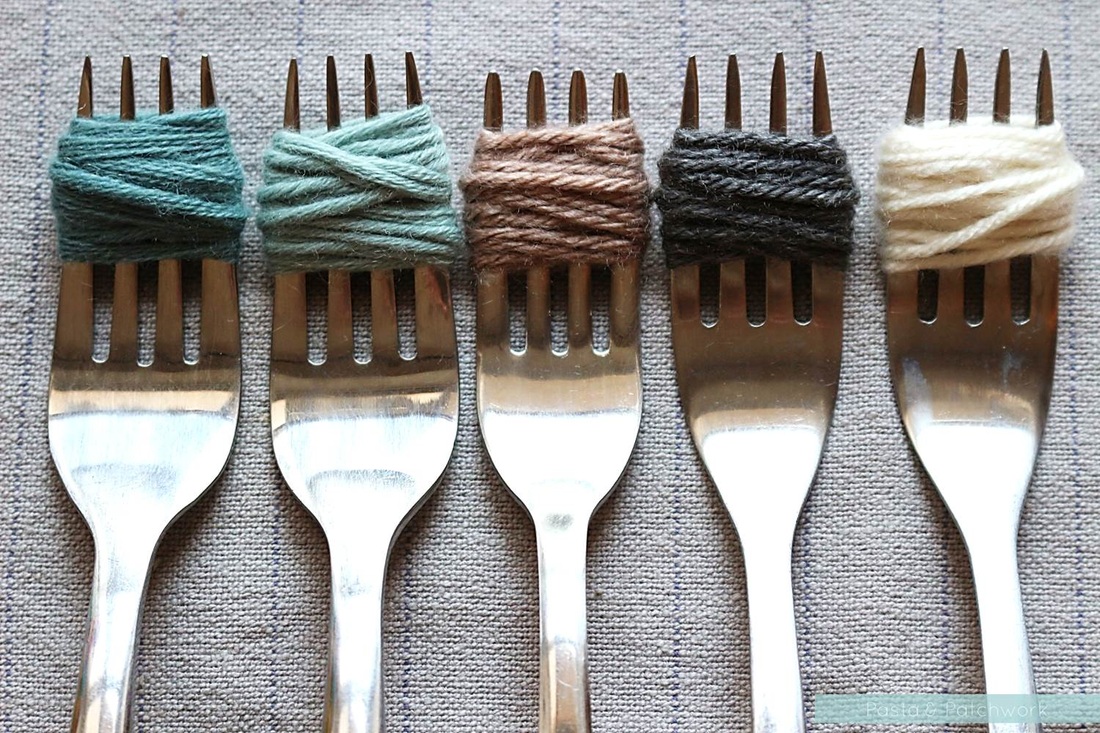
I used two completely different yarns. Not orthodox perhaps but I think the colours go together beautifully and it was a good way of using up the tiny bits of blue I had lying around!
From left to right:
Lanar Milano no. 449, Lanar Milano no. 826, WI Soft & Smooth Aran Biscuit, WI Soft & Smooth Aran Grey, WI Soft & Smooth Aran Cream
From left to right:
Lanar Milano no. 449, Lanar Milano no. 826, WI Soft & Smooth Aran Biscuit, WI Soft & Smooth Aran Grey, WI Soft & Smooth Aran Cream
For the granny trebles I used a 6 mm inline hook. I then switched to a 5 mm tapered hook for the bobbles, as I find inline hooks snag more easily when you’re trying to pull up multiple loops!
I really like the bobbles, though I should add that I did not come up with them myself. I found an image on Pinterest, and worked the stitch out from there. Unfortunately the link is corrupt and I haven’t been able to find out who the image, and therefore the motif, belongs to. If you know, please get in touch so I can acredit it.
I really like the bobbles, though I should add that I did not come up with them myself. I found an image on Pinterest, and worked the stitch out from there. Unfortunately the link is corrupt and I haven’t been able to find out who the image, and therefore the motif, belongs to. If you know, please get in touch so I can acredit it.
Crochet Bobble Edge Tutorial
Regardless of what you're working with - a poncho, a granny square blanket - you need to make a row of double crochets (single crochets if you're in the US) first. This will give you a much neater finish than if you were to work straight into the granny trebles (doubles). Make sure that the total number of DCs (SCs) is divisible by two.
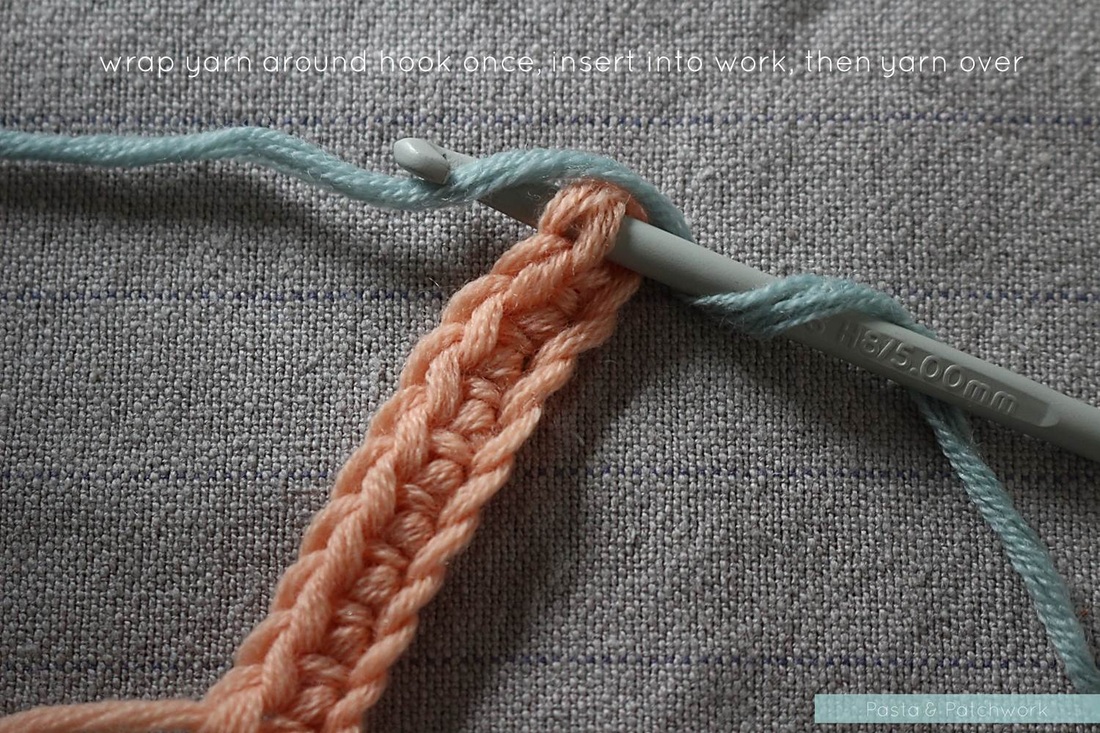
Once you've done your row of DCs (SCs), wrap your yarn around the hook once, insert into any DC (SC), and then yarn over
Once you've done your row of DCs (SCs), wrap your yarn around the hook once, insert into any DC (SC), and then yarn over
Pull through the DC (SC), then yarn over again
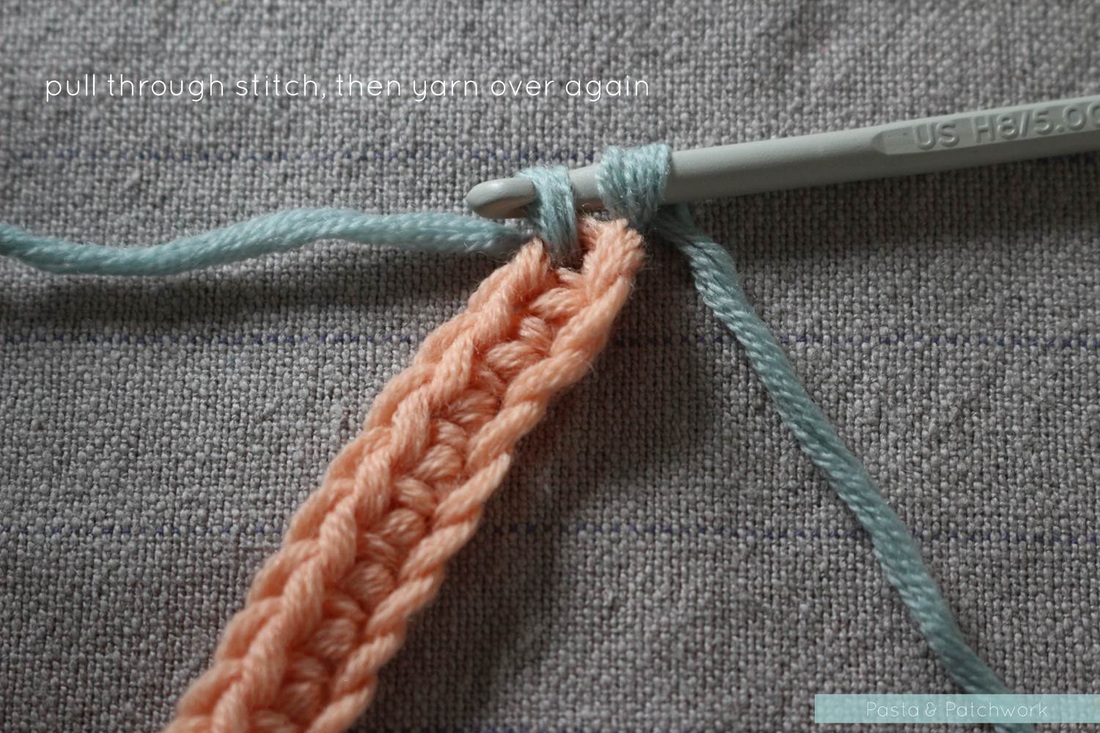
Pull through both loops on the hook to complete the first DC (SC). You will have a loose tail, but as you come all the way around your work, you can slip stitch into this first DC (SC) and then sew in the tail with a wool needle.
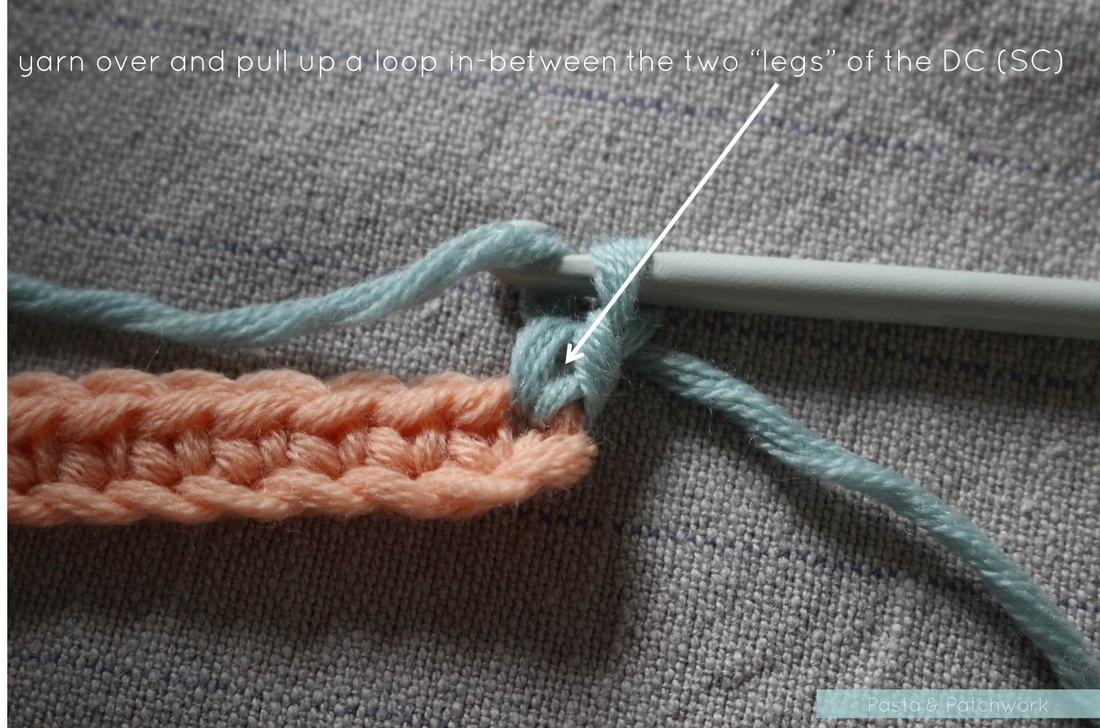
To make a bobble, yarn over and pull up a loop (about as tall two chains) in-between the "legs" of the DC (SC)
To make a bobble, yarn over and pull up a loop (about as tall two chains) in-between the "legs" of the DC (SC)
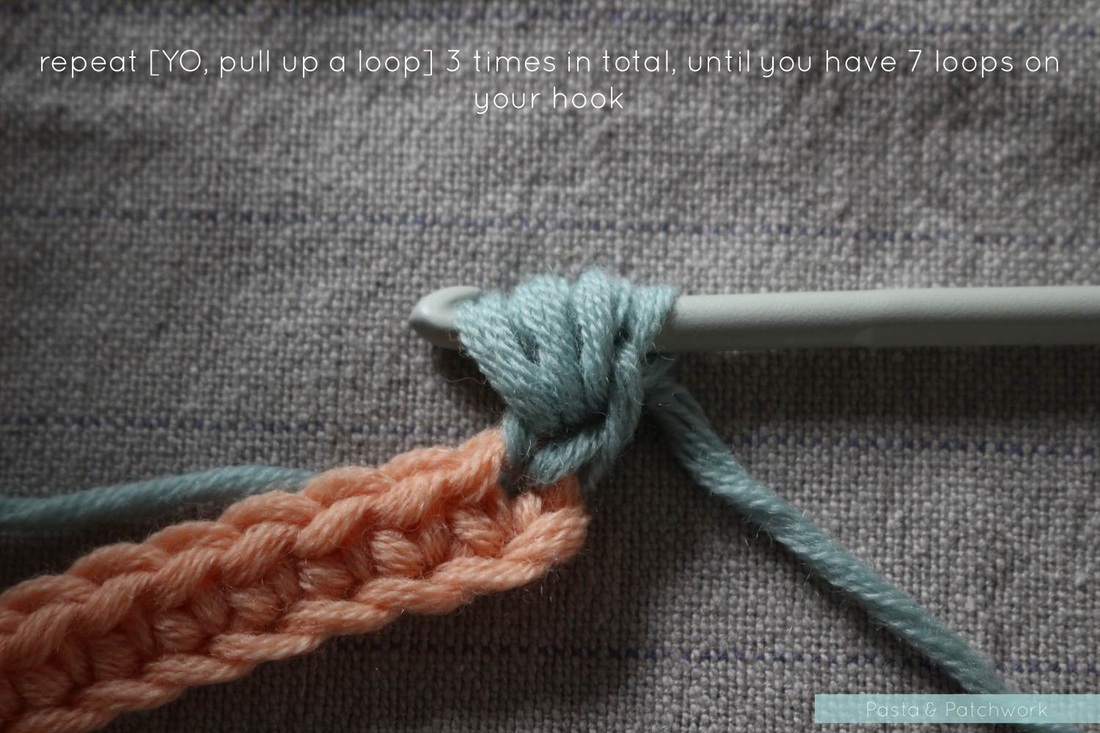
Repeat [YO, pull up a loop] two more times (so three times in total), until you have seven loops on your hook
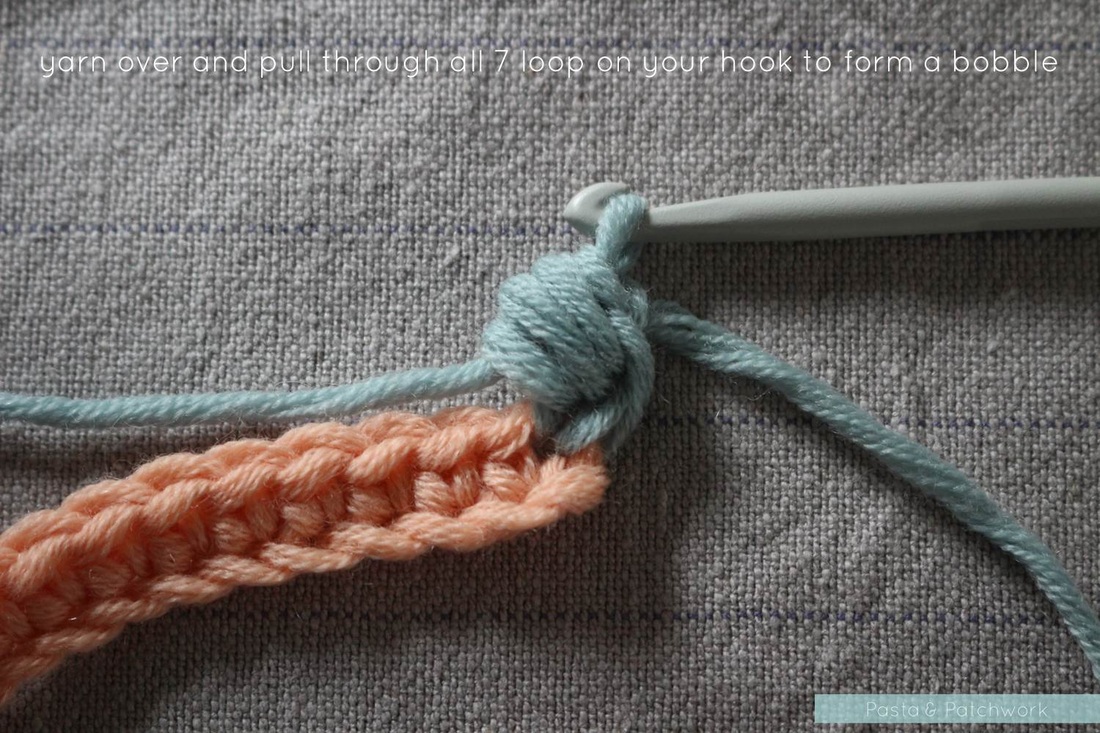
Yarn over and pull through all seven loops on your hook to form a bobble
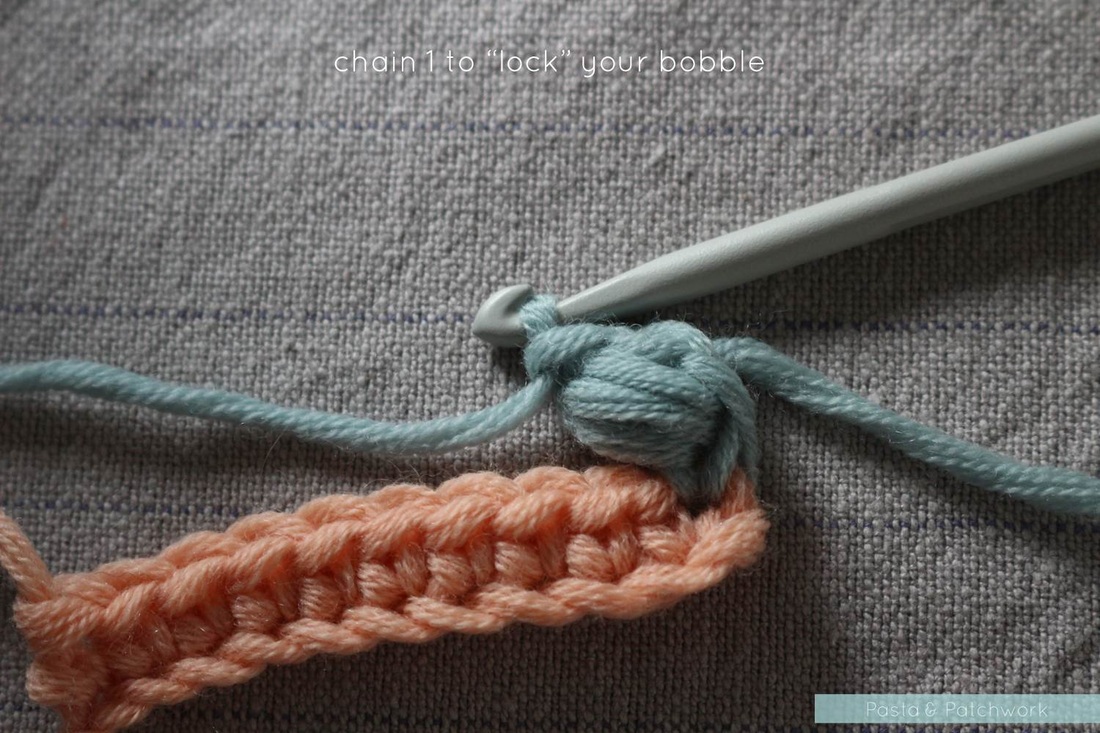
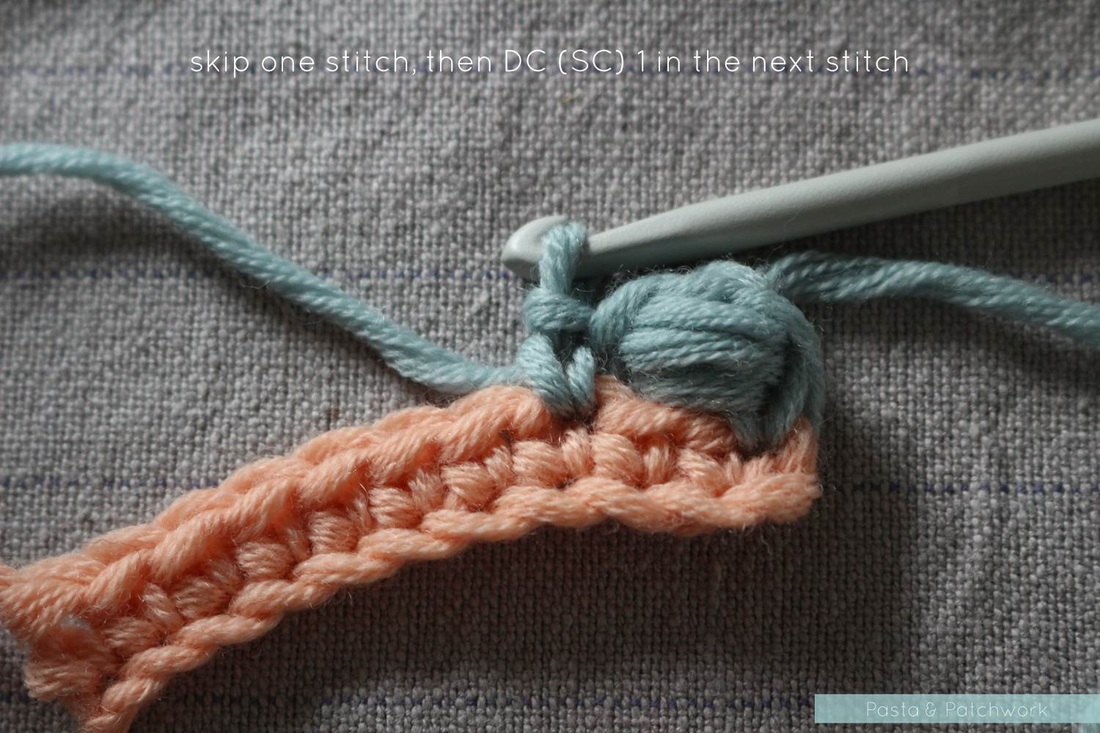
chain once to "lock" the bobble
Skip one* stitch, the DC SC) once into the next stitch
And repeat!
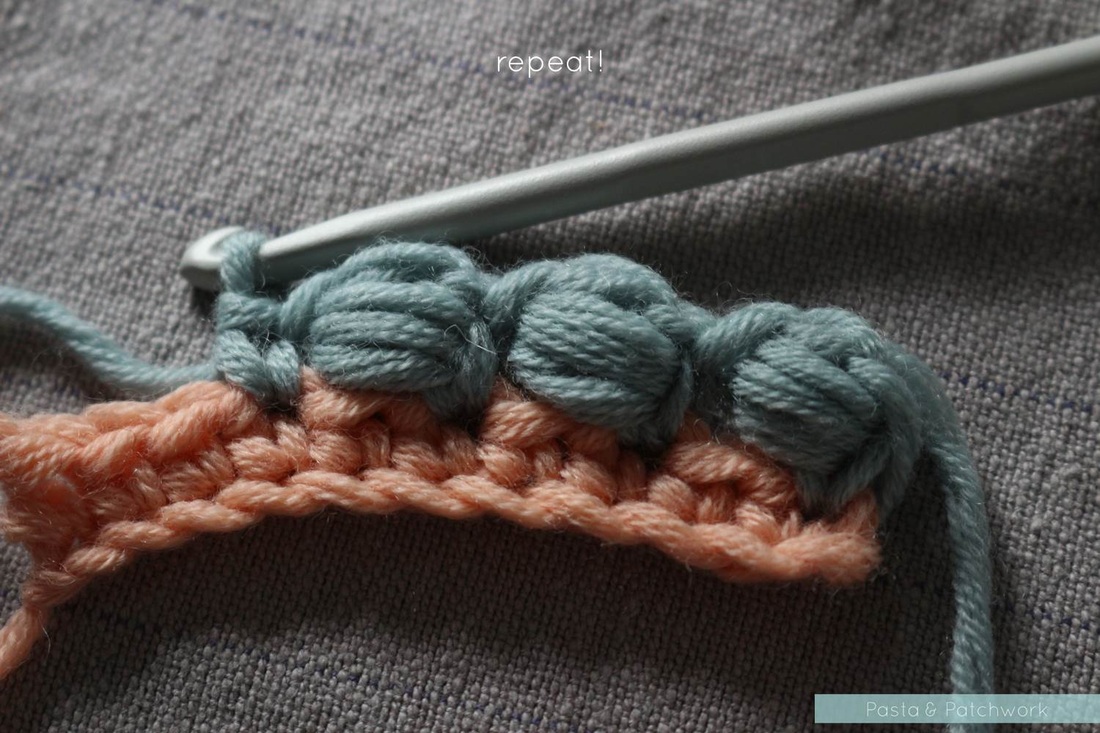
*Note: You could also skip two stitches instead of one. The poncho would be less "wavy" at the bottom as a result. This is purely down to personal preference, but if you do skip two stitches you need to make sure that the total number of DCs (SCs) on your work is divisible by three.
The pattern for this poncho is by Simone Francis. It appeared first in Simply Crochet #25 and is available for purchase now on Ravelry.
Copyright for the bobble edge tutorial images belongs to Eline Alcocer and may not be reproduced in any way without prior written consent. You are welcome to make and use this bobble edge as you wish, but please do not sell it as a pattern nor claim the pattern as your own. Please link back to this page if you write about the tutorial in any way. Thank you and happy crocheting!
Copyright for the bobble edge tutorial images belongs to Eline Alcocer and may not be reproduced in any way without prior written consent. You are welcome to make and use this bobble edge as you wish, but please do not sell it as a pattern nor claim the pattern as your own. Please link back to this page if you write about the tutorial in any way. Thank you and happy crocheting!
Come say hello: