I have to start this post with a big, fat admission of guilt: I did not think of these toys or make all of them myself (credit to the fantastic people who did to follow)... But they were simply too lovely and too ingenious not to share!
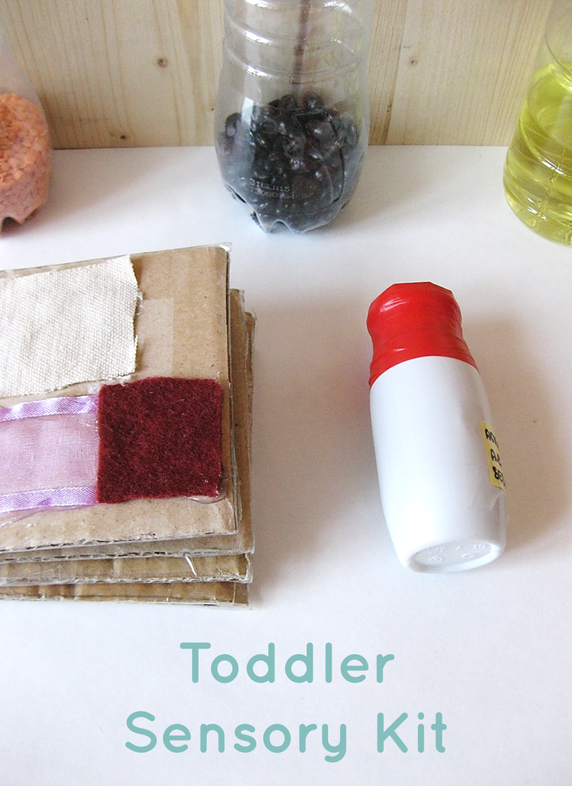
This toddler sensory kit contains:
a sensory book
three large shakers
a small shaker that doubles as a smelling pot
a sensory book
three large shakers
a small shaker that doubles as a smelling pot
This kit is perfect for introducing older babies and toddlers to new textures, sounds, colours and smells. All of the items in the kit are made using a combination of recycled materials and pantry staples. Best of all, there are lots of possible variations, so just use what you have at home!
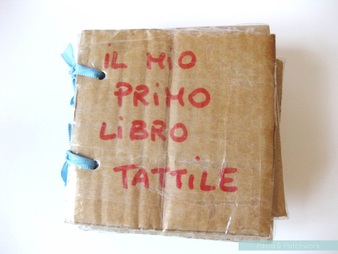
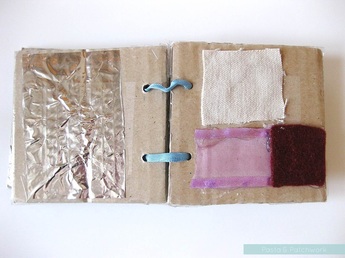
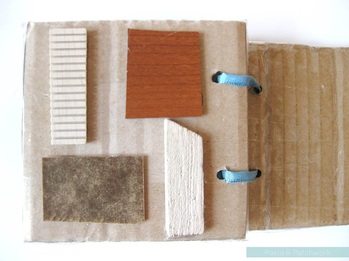
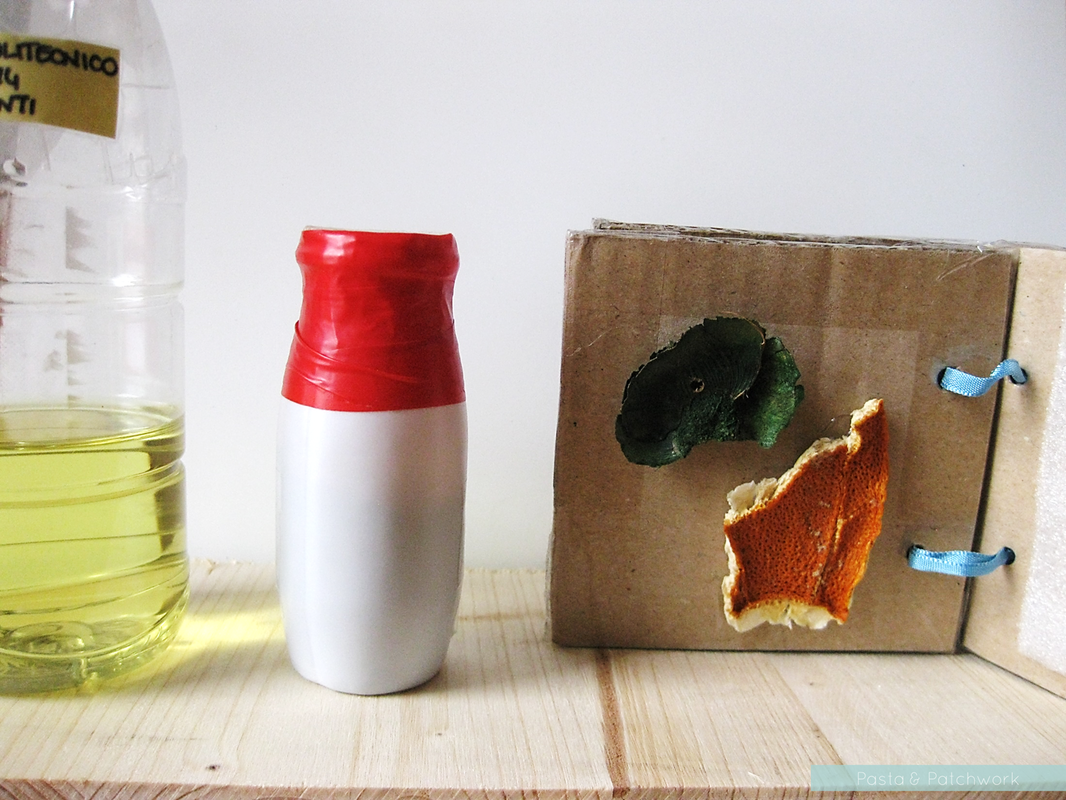
Sensory Book
You will need:
thick cardboard
sticky tape (or if your book is very large, sticky-backed plastic)
a hot glue gun (or other strong adhesive)
a hole puncher
a ribbon, cut into two equal lengths
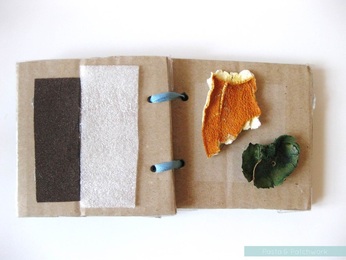
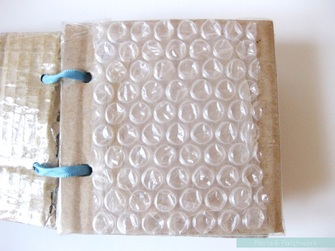
scraps of materials with different textures - bubble wrap, foil, cling film, crinkly paper, various fabrics, bits of wood & laminate flooring, potpourri, dried fruit, sand paper, etc.
thick cardboard
sticky tape (or if your book is very large, sticky-backed plastic)
a hot glue gun (or other strong adhesive)
a hole puncher
a ribbon, cut into two equal lengths
scraps of materials with different textures - bubble wrap, foil, cling film, crinkly paper, various fabrics, bits of wood & laminate flooring, potpourri, dried fruit, sand paper, etc.
Instructions:
1. Cut the cardboard into squares. How large they are depends on how many materials you have to stick in the book!
2. Reinforce the edges of each square as well as the whole of the first and last pages with sticky tape or sticky-backed plastic. Punch two holes in each page.
3. Stick your materials onto the squares with a hot glue gun. Although optional, it's nice to put similar materials on the same page - fabrics on one page, woods on another, etc.
4. Tie your squares together with the string to form a book.
| 
|
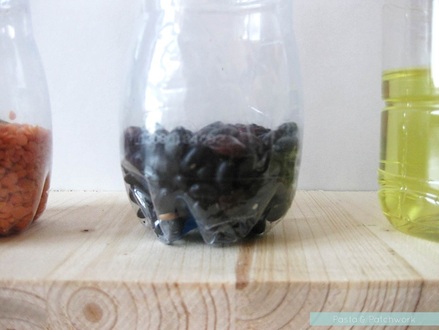
Large Shakers
You will need:
three empty drinks bottles of 500 ml
sticky tape
water
food colouring
dried food - rice, beans, lentils, etc.
three empty drinks bottles of 500 ml
sticky tape
water
food colouring
dried food - rice, beans, lentils, etc.
Instructions:
1. Clean and dry the bottles thoroughly.
2. Fill 1/5 to 1/4 of each bottle with one material. Add a few drops of food colouring to the bottle containing water.
3. Screw on the bottle tops tightly and secure with lots and lots of sticky tape.
1. Clean and dry the bottles thoroughly.
2. Fill 1/5 to 1/4 of each bottle with one material. Add a few drops of food colouring to the bottle containing water.
3. Screw on the bottle tops tightly and secure with lots and lots of sticky tape.
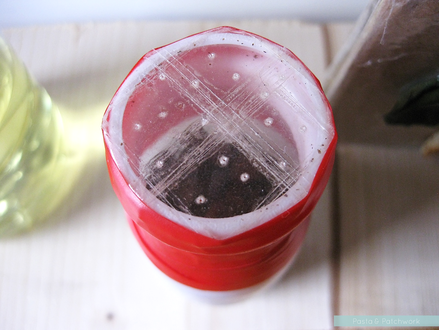
Small Shaker/Smelling Bottle
You will need:
an empty, plastic spice jar or probiotic drink bottle
coloured tape
sticky tape
coffee beans
a pin
an empty, plastic spice jar or probiotic drink bottle
coloured tape
sticky tape
coffee beans
a pin
Instructions:
1. Clean and dry the bottle or jar thoroughly.
2. Fill 1/2 of the bottle or jar with coffee beans.
3. Close the top off with clear sticky tape, then prick holes with a pin.
4. Stick several layers of coloured tape around the top of the bottle or jar.
1. Clean and dry the bottle or jar thoroughly.
2. Fill 1/2 of the bottle or jar with coffee beans.
3. Close the top off with clear sticky tape, then prick holes with a pin.
4. Stick several layers of coloured tape around the top of the bottle or jar.
So who was it that thought of these wonderful toys? M-Little's nursery teachers, who sent him home from the summer party with this lovely gift:
Added to the two big shakers we already had (so I did make something in this post myself!), we now have the perfect, handmade Toddler Sensory Kit.