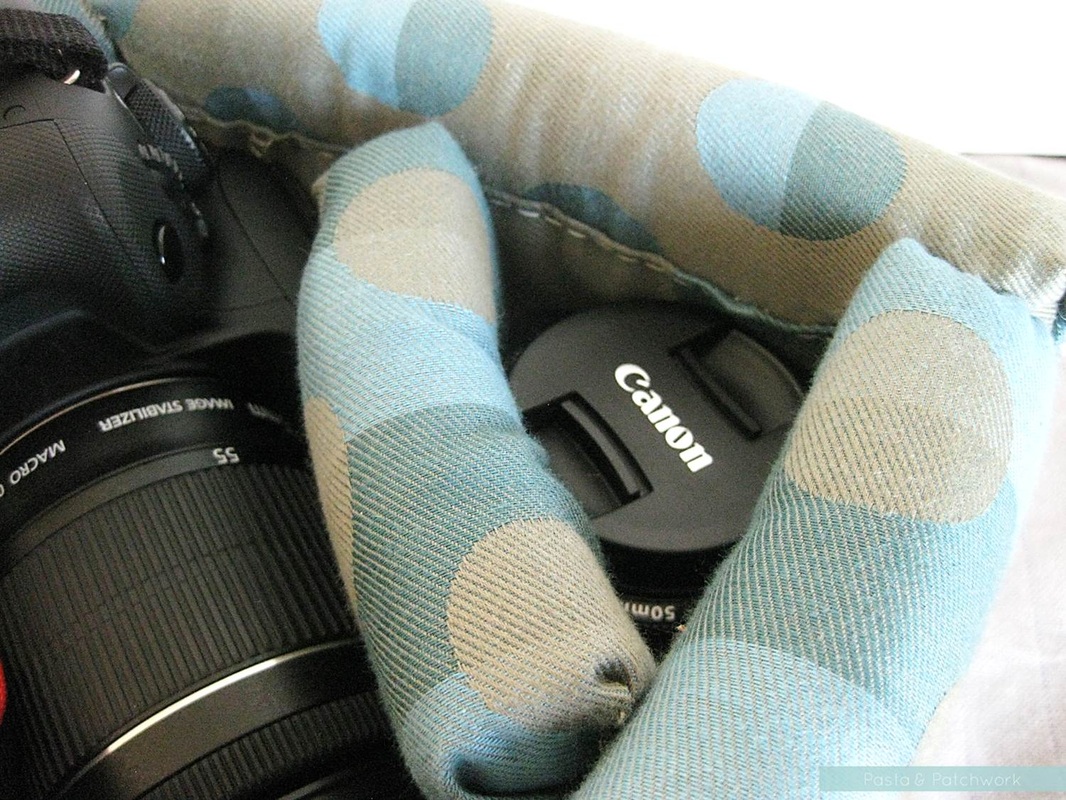
Back in November Mr P&P treated ourselves to a new toy, one that we’d been talking about getting since we first moved in together (6 years ago!): a Digital SLR camera. We finally settled on the Canon 100D, with kit lens and 50mm lens. It is a thing of beauty.
Your average commercially available camera bag, however, is not. It’s ugly and characterless and screams “hello! Camera inside! Nick me!”. And expensive.
So I decided to make my own, and today I’m thrilled to share this tutorial for a handmade camera cosy with you.
Your average commercially available camera bag, however, is not. It’s ugly and characterless and screams “hello! Camera inside! Nick me!”. And expensive.
So I decided to make my own, and today I’m thrilled to share this tutorial for a handmade camera cosy with you.
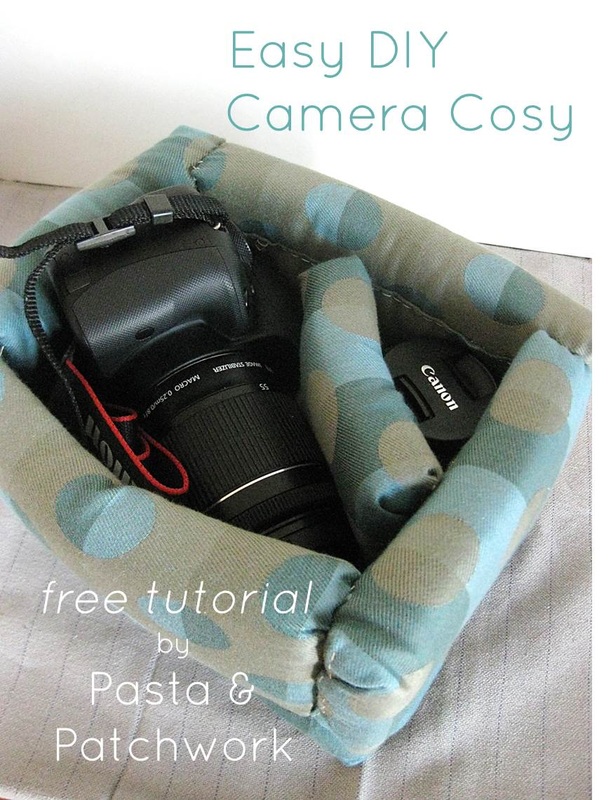
Easy DIY DSLR Camera Cosy
The idea is that this cosy fits into any (large-ish) handbag, removing the need for a separate camera bag. Which, when you also carry a removal van’s worth of toddler stuff with you at all times (or so it feels), is rather a good thing.
That said, I’m also in the process of making an “outer” bag that fits around this cosy perfectly. Once it’s done I’ll share that too so check back soon!
This cosy is quick to make up with some cheap supplies and basic sewing skills. Note that it’s made to fit a Canon 100D, which is currently the smallest DSLR on the market. If you have a larger camera you will need to make a bigger cosy!
Supplies:
- foam padding (of 1 to 2 cm thick) -
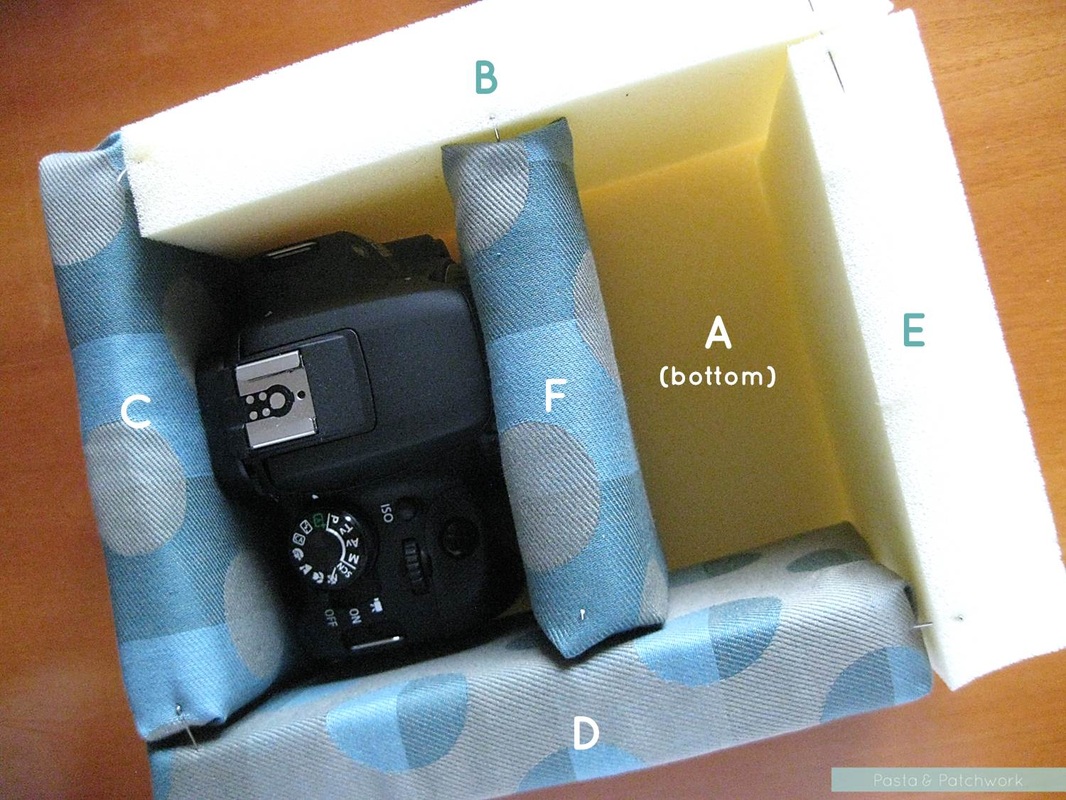
1 piece of 21x16 cm (A - bottom)
2 pieces of 18x10 cm (B&D - long sides)
2 pieces of 14x10cm (C&E - short sides)
1 piece of 12x10 cm (F - middle piece)
- fabric to cover each piece -
1 piece of 25x38 cm (A)
2 pieces of 22x24 cm (B&D)
2 pieces of 18x24cm (C&E)
1 piece of 16x24 cm (F)
- needle & thread
- pins
- (optional) glue gun
- foam padding (of 1 to 2 cm thick) -
1 piece of 21x16 cm (A - bottom)
2 pieces of 18x10 cm (B&D - long sides)
2 pieces of 14x10cm (C&E - short sides)
1 piece of 12x10 cm (F - middle piece)
- fabric to cover each piece -
1 piece of 25x38 cm (A)
2 pieces of 22x24 cm (B&D)
2 pieces of 18x24cm (C&E)
1 piece of 16x24 cm (F)
- needle & thread
- pins
- (optional) glue gun
Instructions:
1. Cut the foam and fabric to the required sizes.
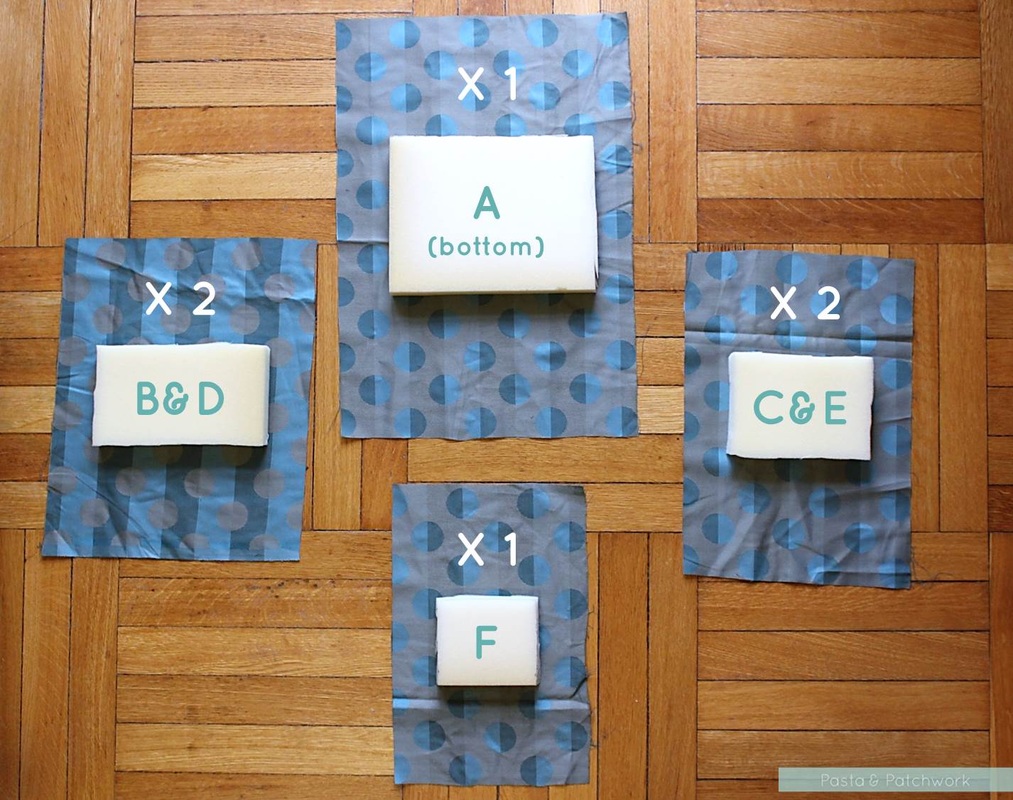
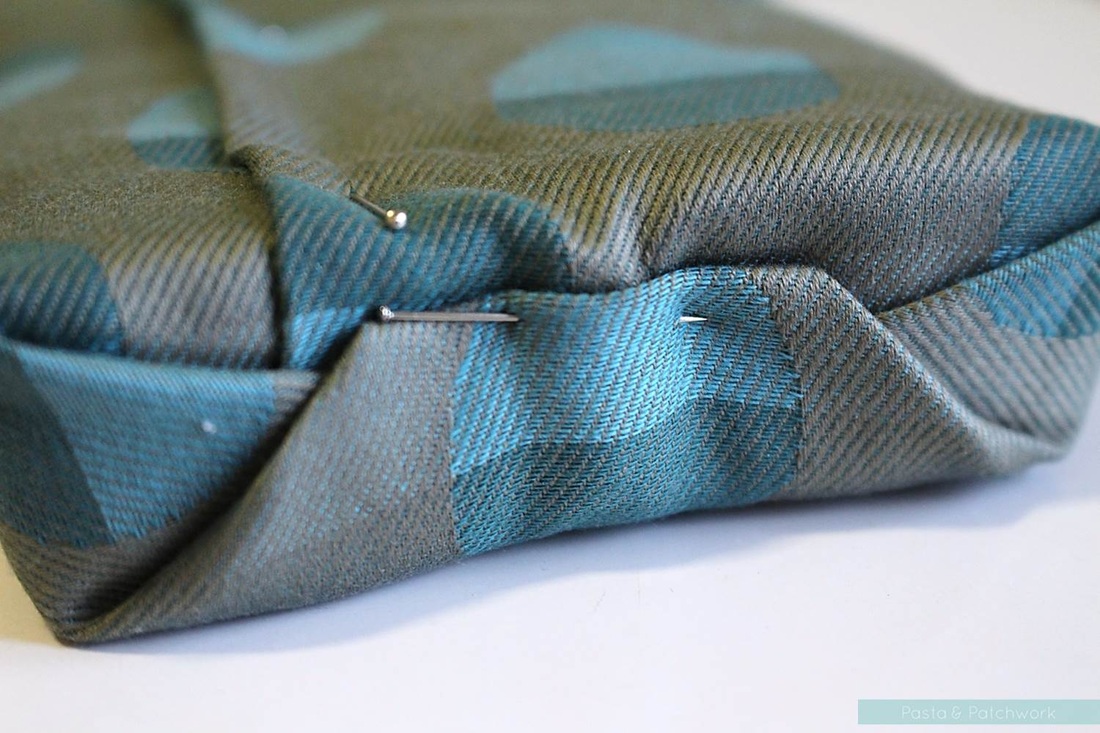
2. Wrap each piece of foam into its fabric as though you were covering a box in wrapping paper. Pin into place. If you find this fiddly and feel like swearing, do go ahead - it won’t show up in your pinterest feed.
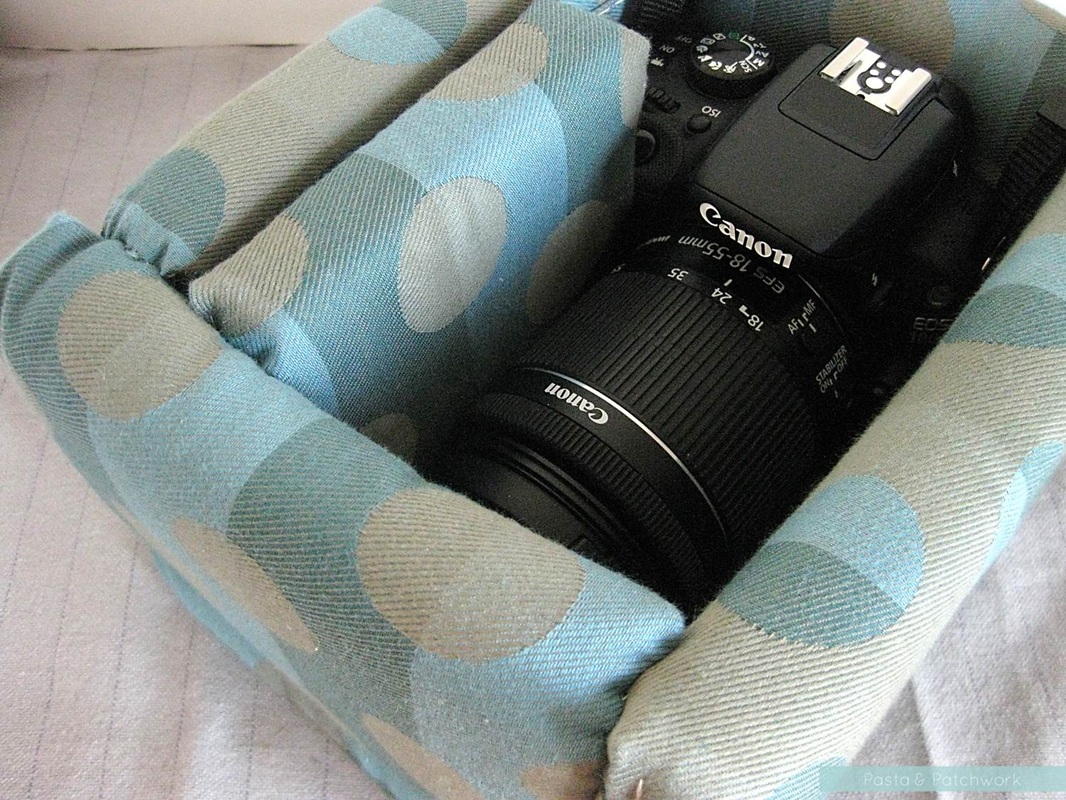
3. At this point it’s a good idea to have a play with your pieces to make sure they’re the right size. Pin them into place and see how well your camera fits (I decided piece F would remain unattached).
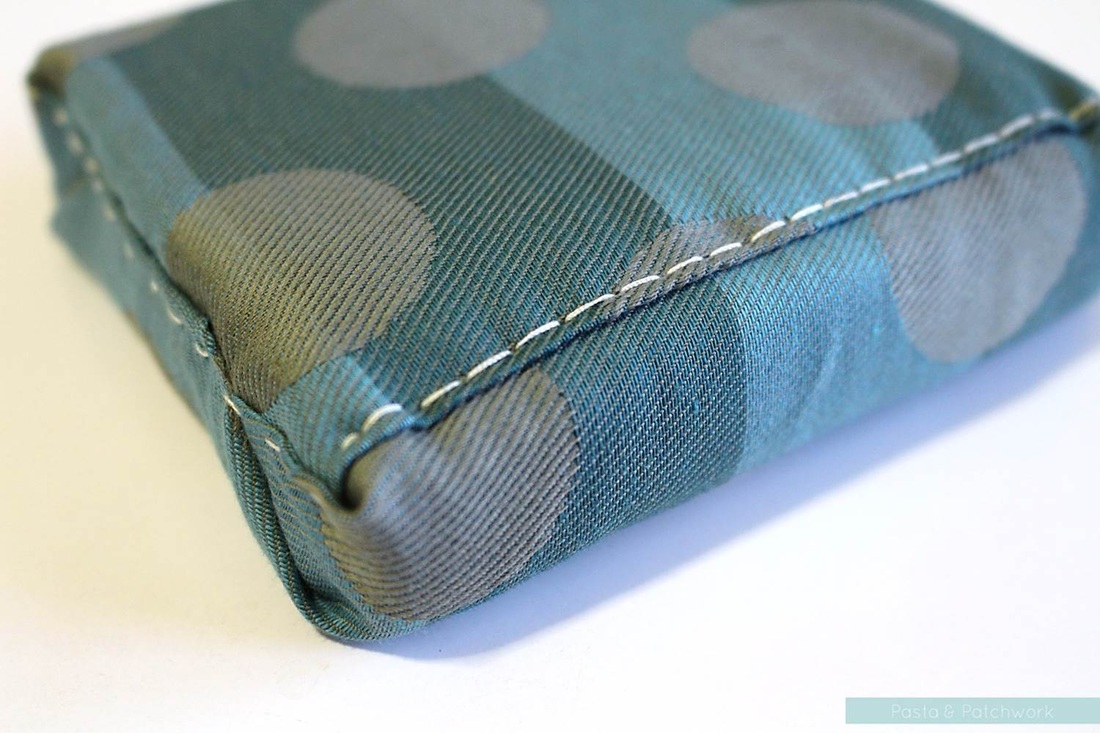
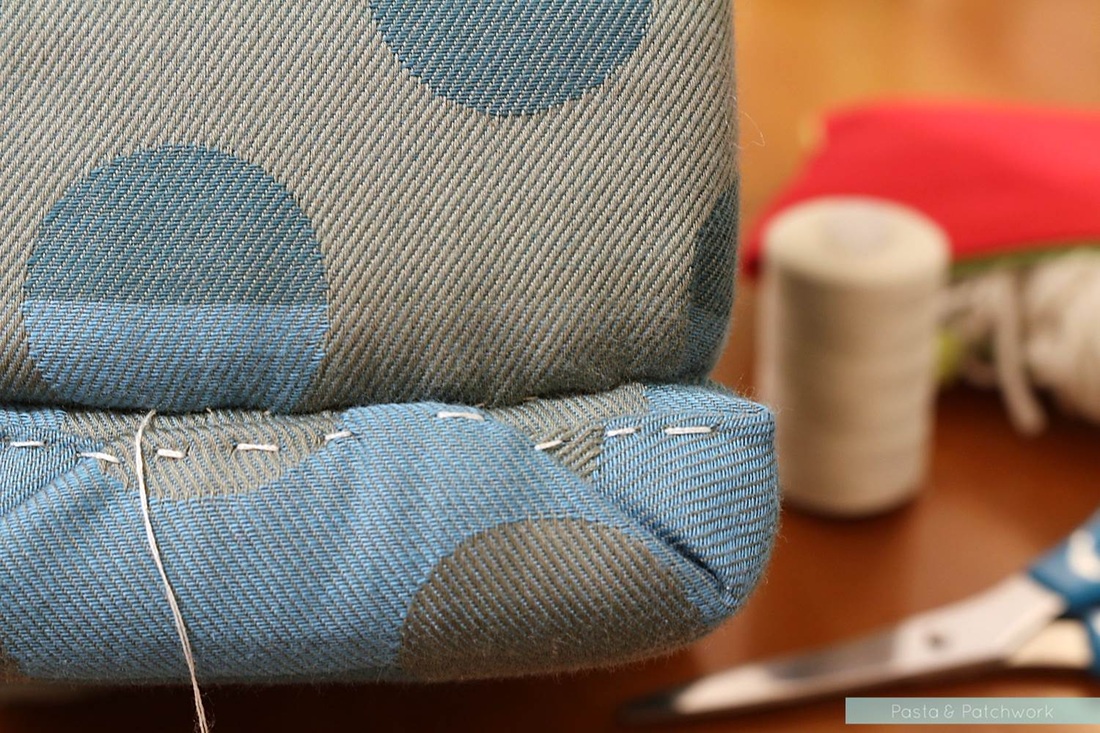
4. Once every piece is pinned, take a second to admire your handiwork, then sew each piece along the top fold and on each of the shortest sides (where you did your parcel wrapping).

5. Using a hot glue gun, assemble your cosy. This adds stability, but it isn’t strictly necessary and if you don’t have a glue gun you can also just pin the pieces together.
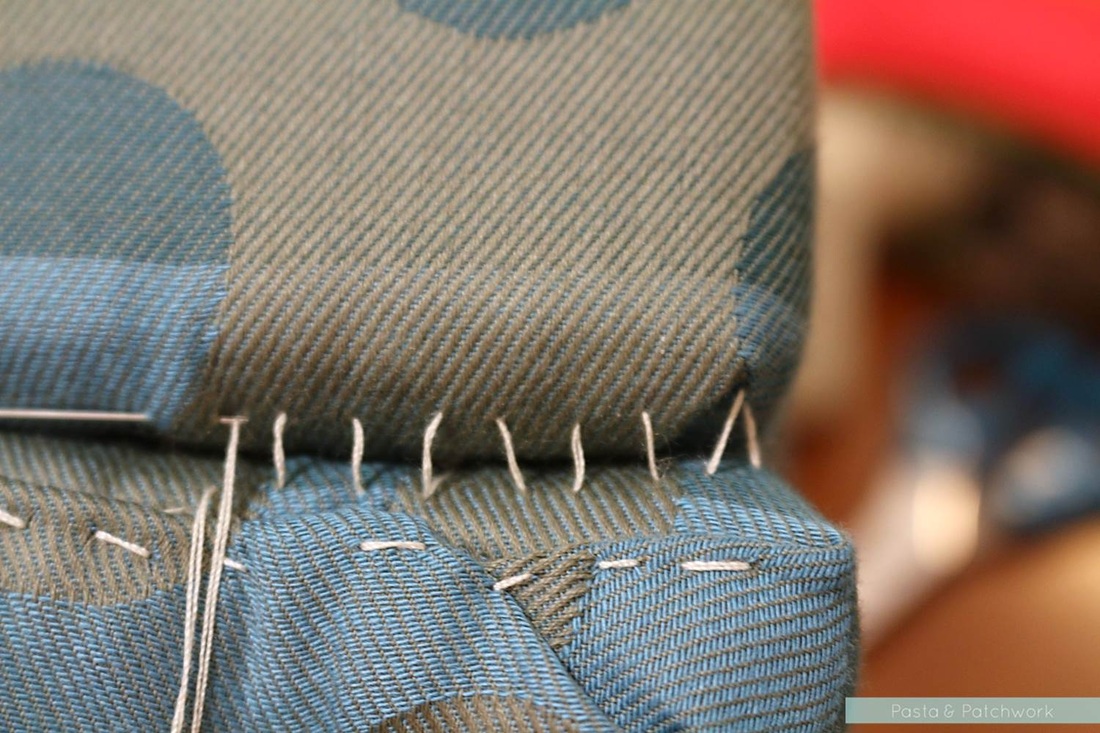
6. Sew your pieces together as inconspicuously as possible. I did this by making a zigzag pattern a few mm away from the edge of each piece, then pulling the thread taut. If you did not glue your pieces together, you will need to sew them on the inside and outside to make sure the cosy is secure.
6. Sew your pieces together as inconspicuously as possible. I did this by making a zigzag pattern a few mm away from the edge of each piece, then pulling the thread taut. If you did not glue your pieces together, you will need to sew them on the inside and outside to make sure the cosy is secure.
Voila! Done-diddly. It ain't the neatest project I've ever done, but it was extremely quick and has proved very useful over the last couple of months already.
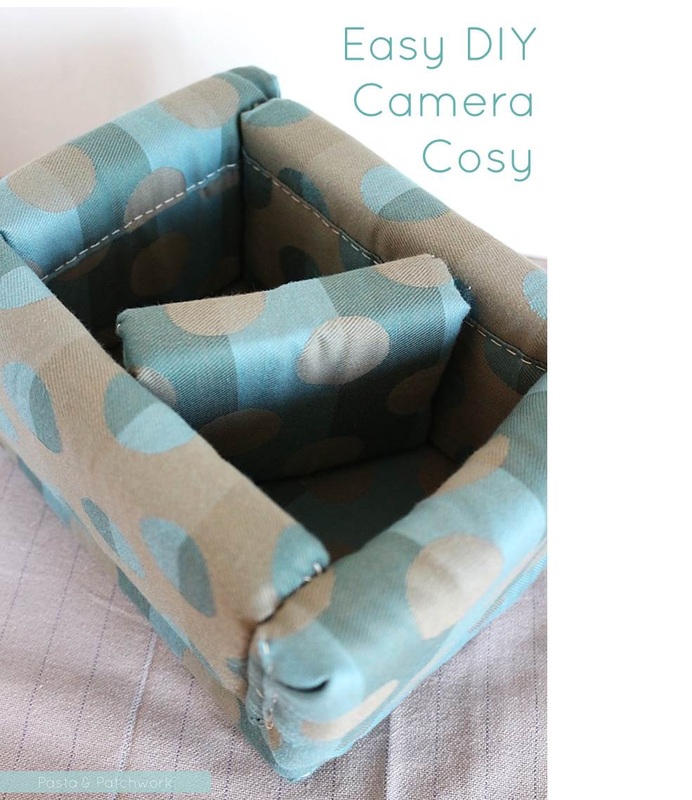

Note that piece F is (re)movable, so I can choose to take both my lenses (left) or just one of them (right).
 |  |
Did you like this camera cosy? Have a look at the other things I've made!
Come say hello: